Using Stitch, Next.js and OpenNext to Build a Personal Homepage
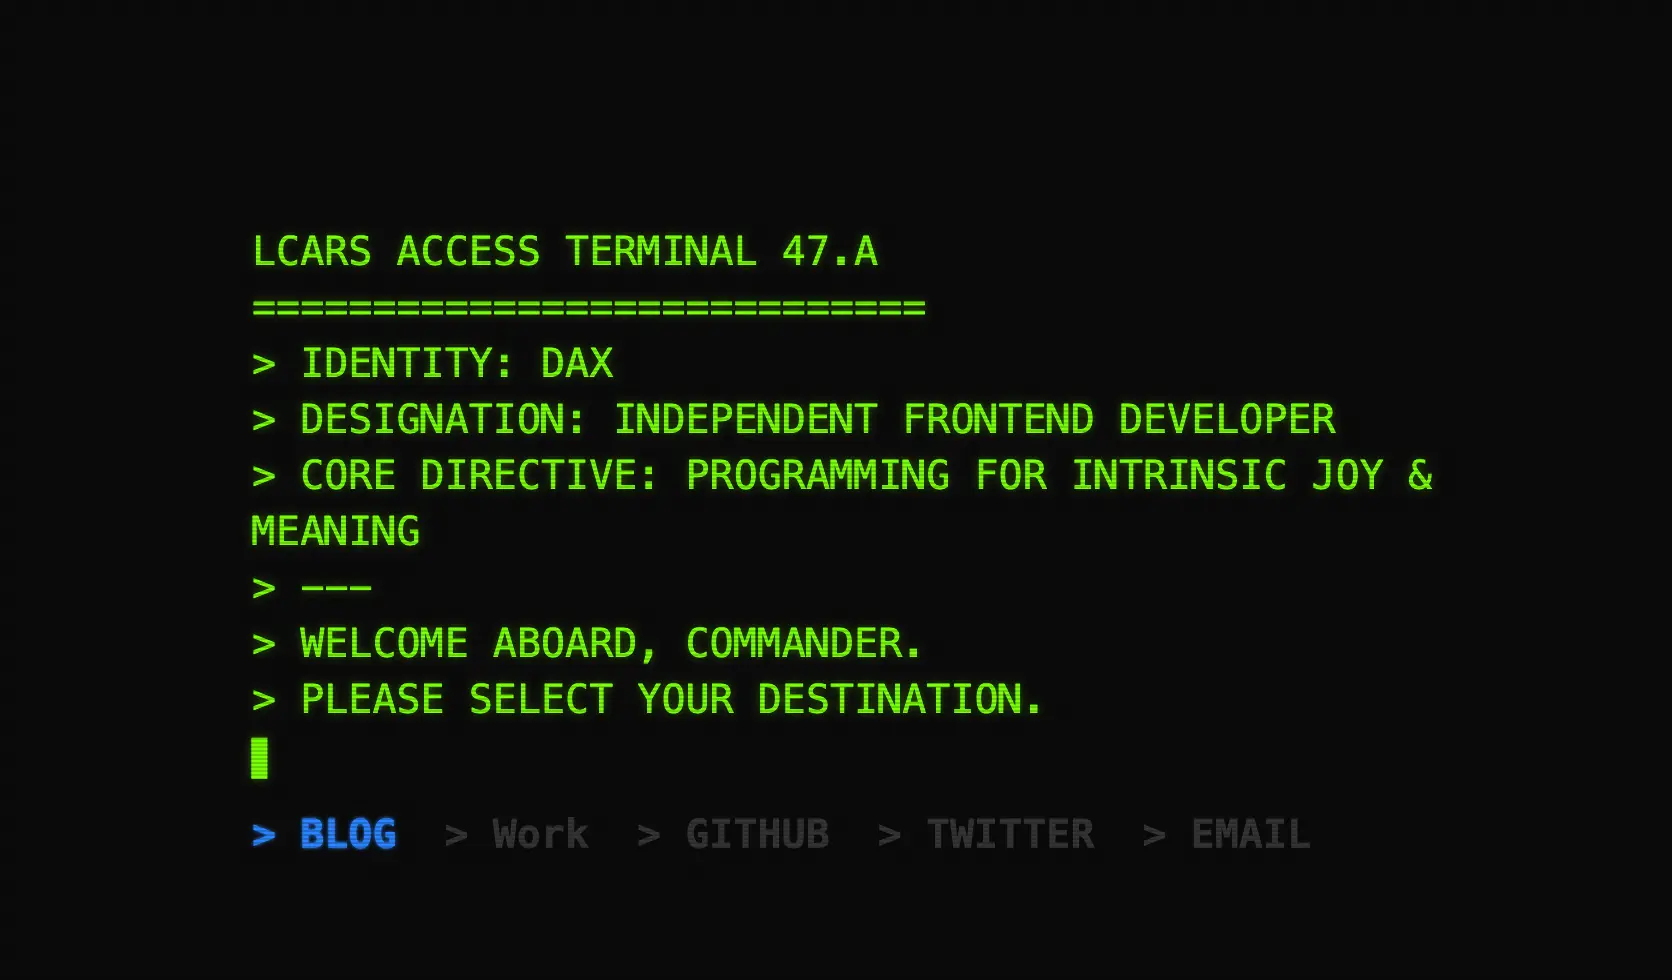
Actually, an even earlier version of my personal homepage looked like the one below. At the time, it was mostly a toy for me to experiment with AI programming when I first started, and it basically had no functionality.
The new version of the personal homepage is currently deployed and online, and can be accessed directly at daolanx.com.
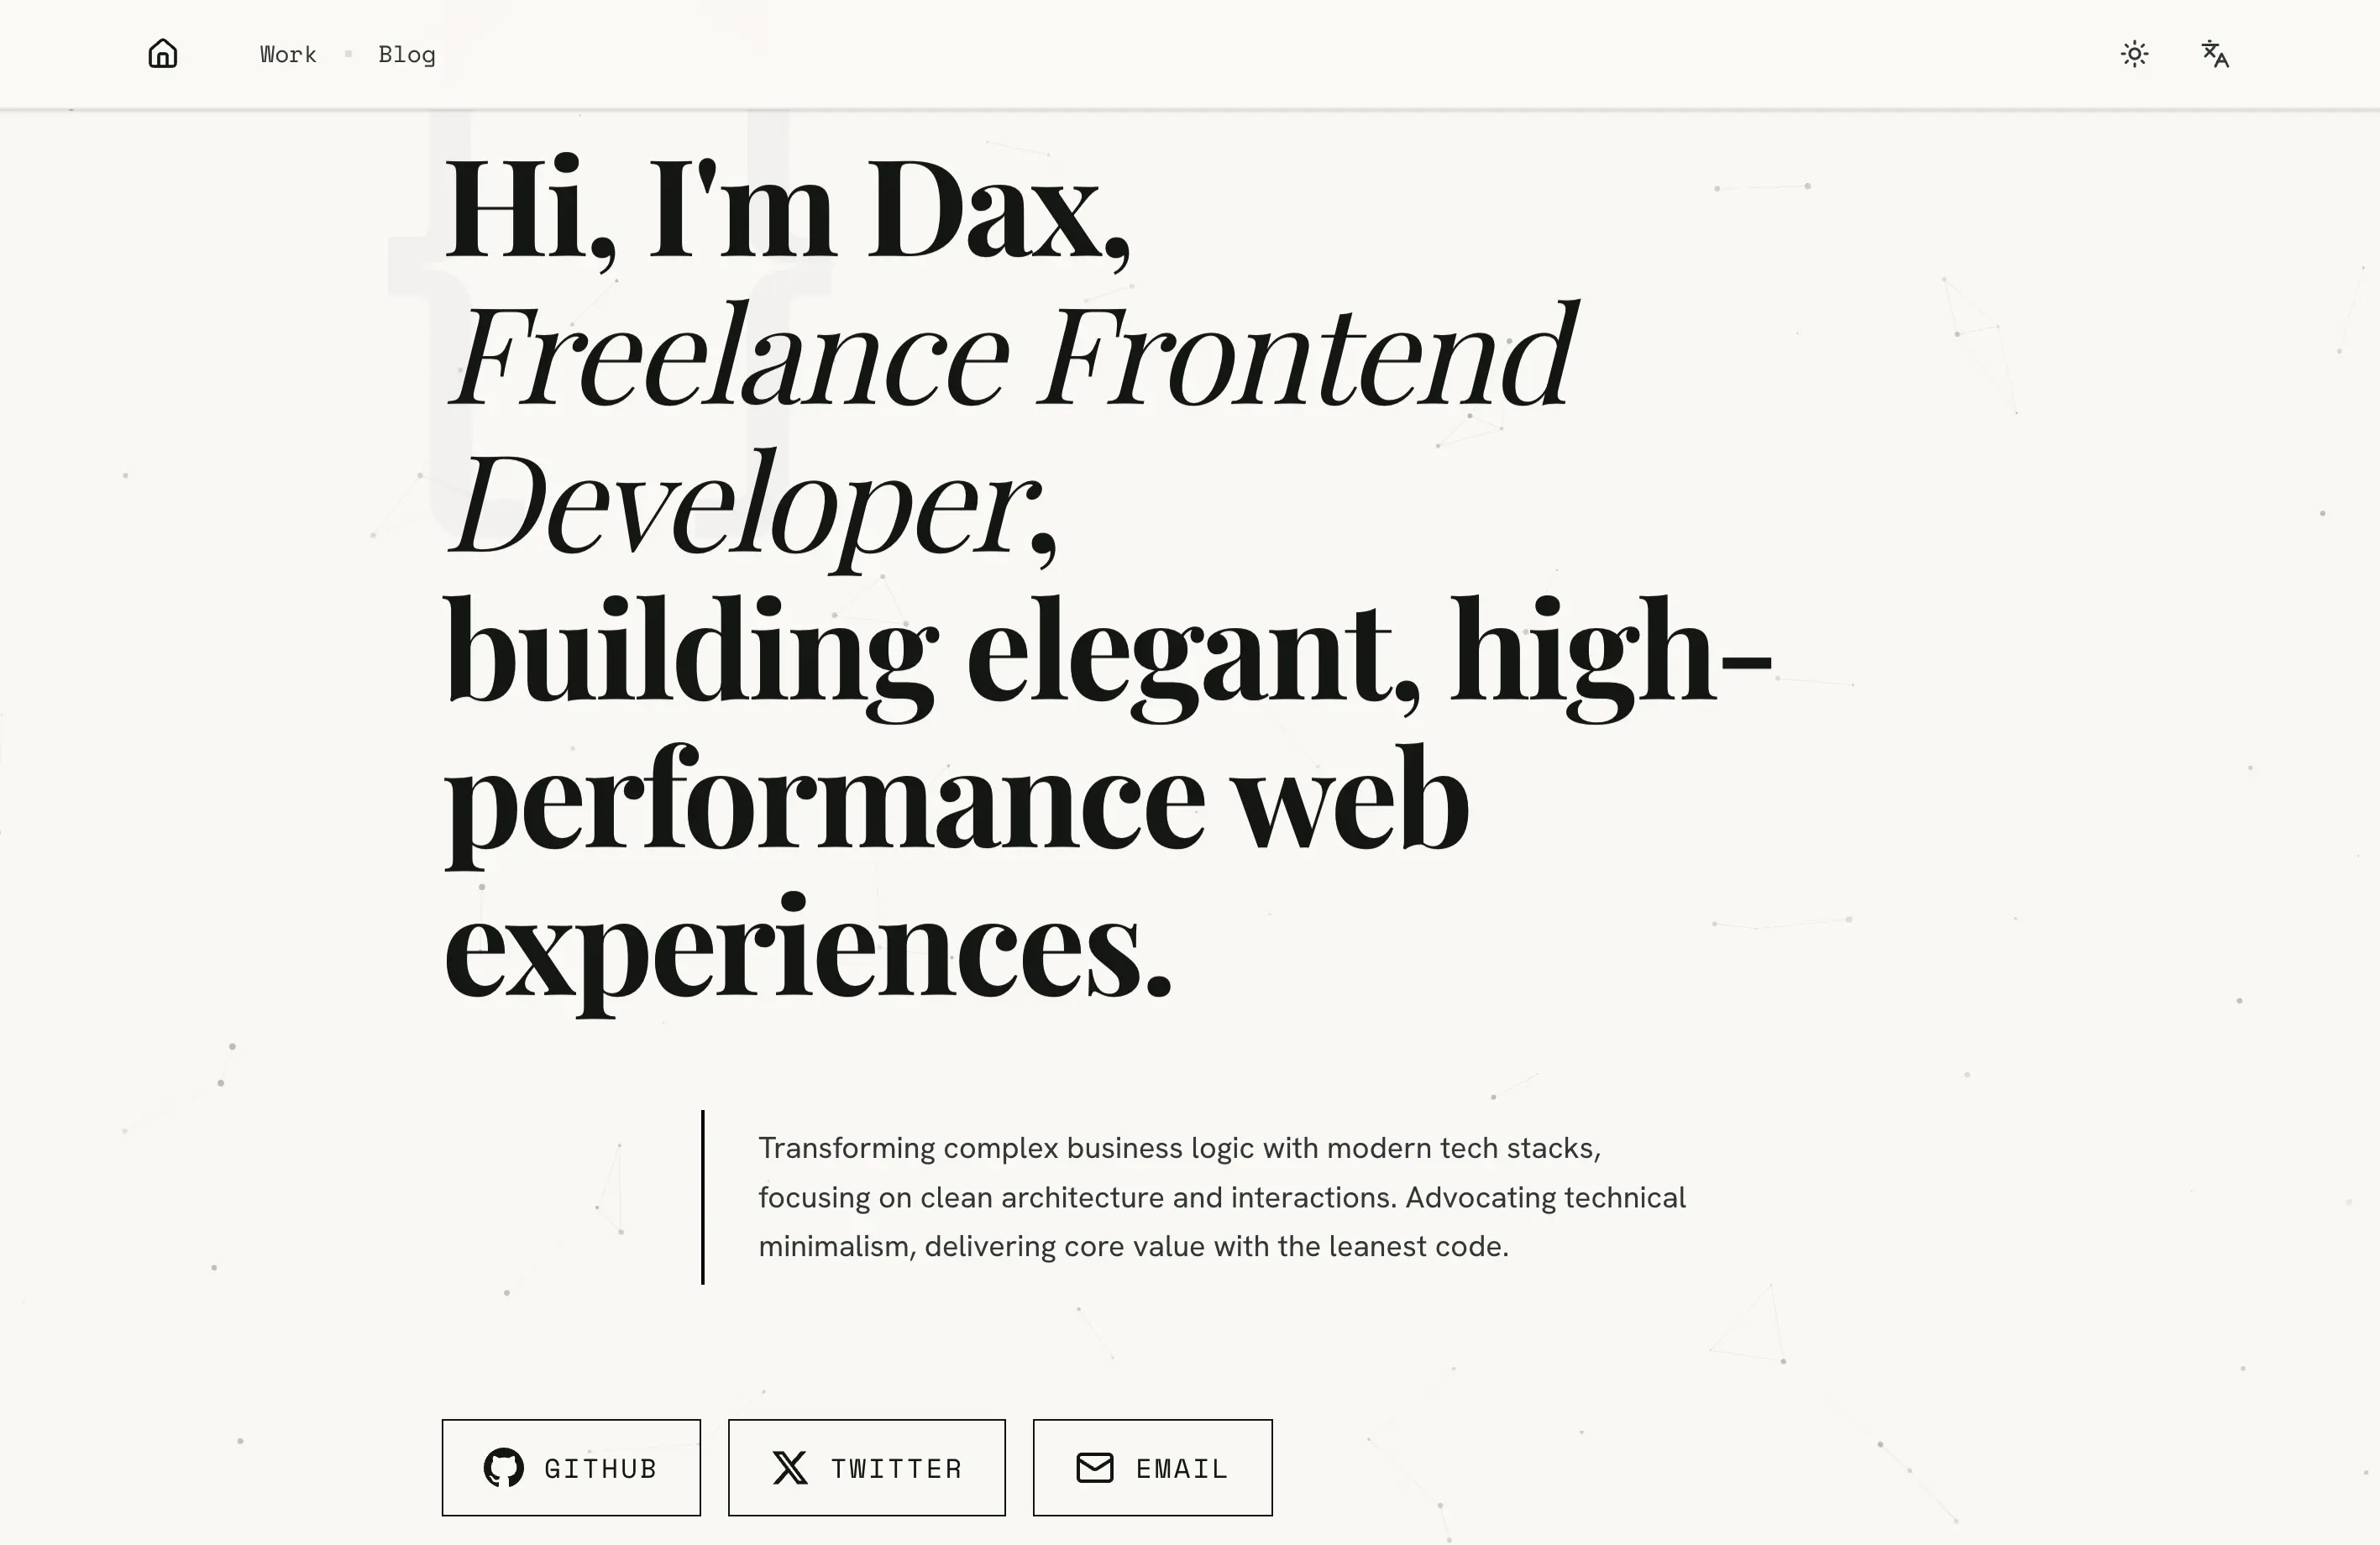
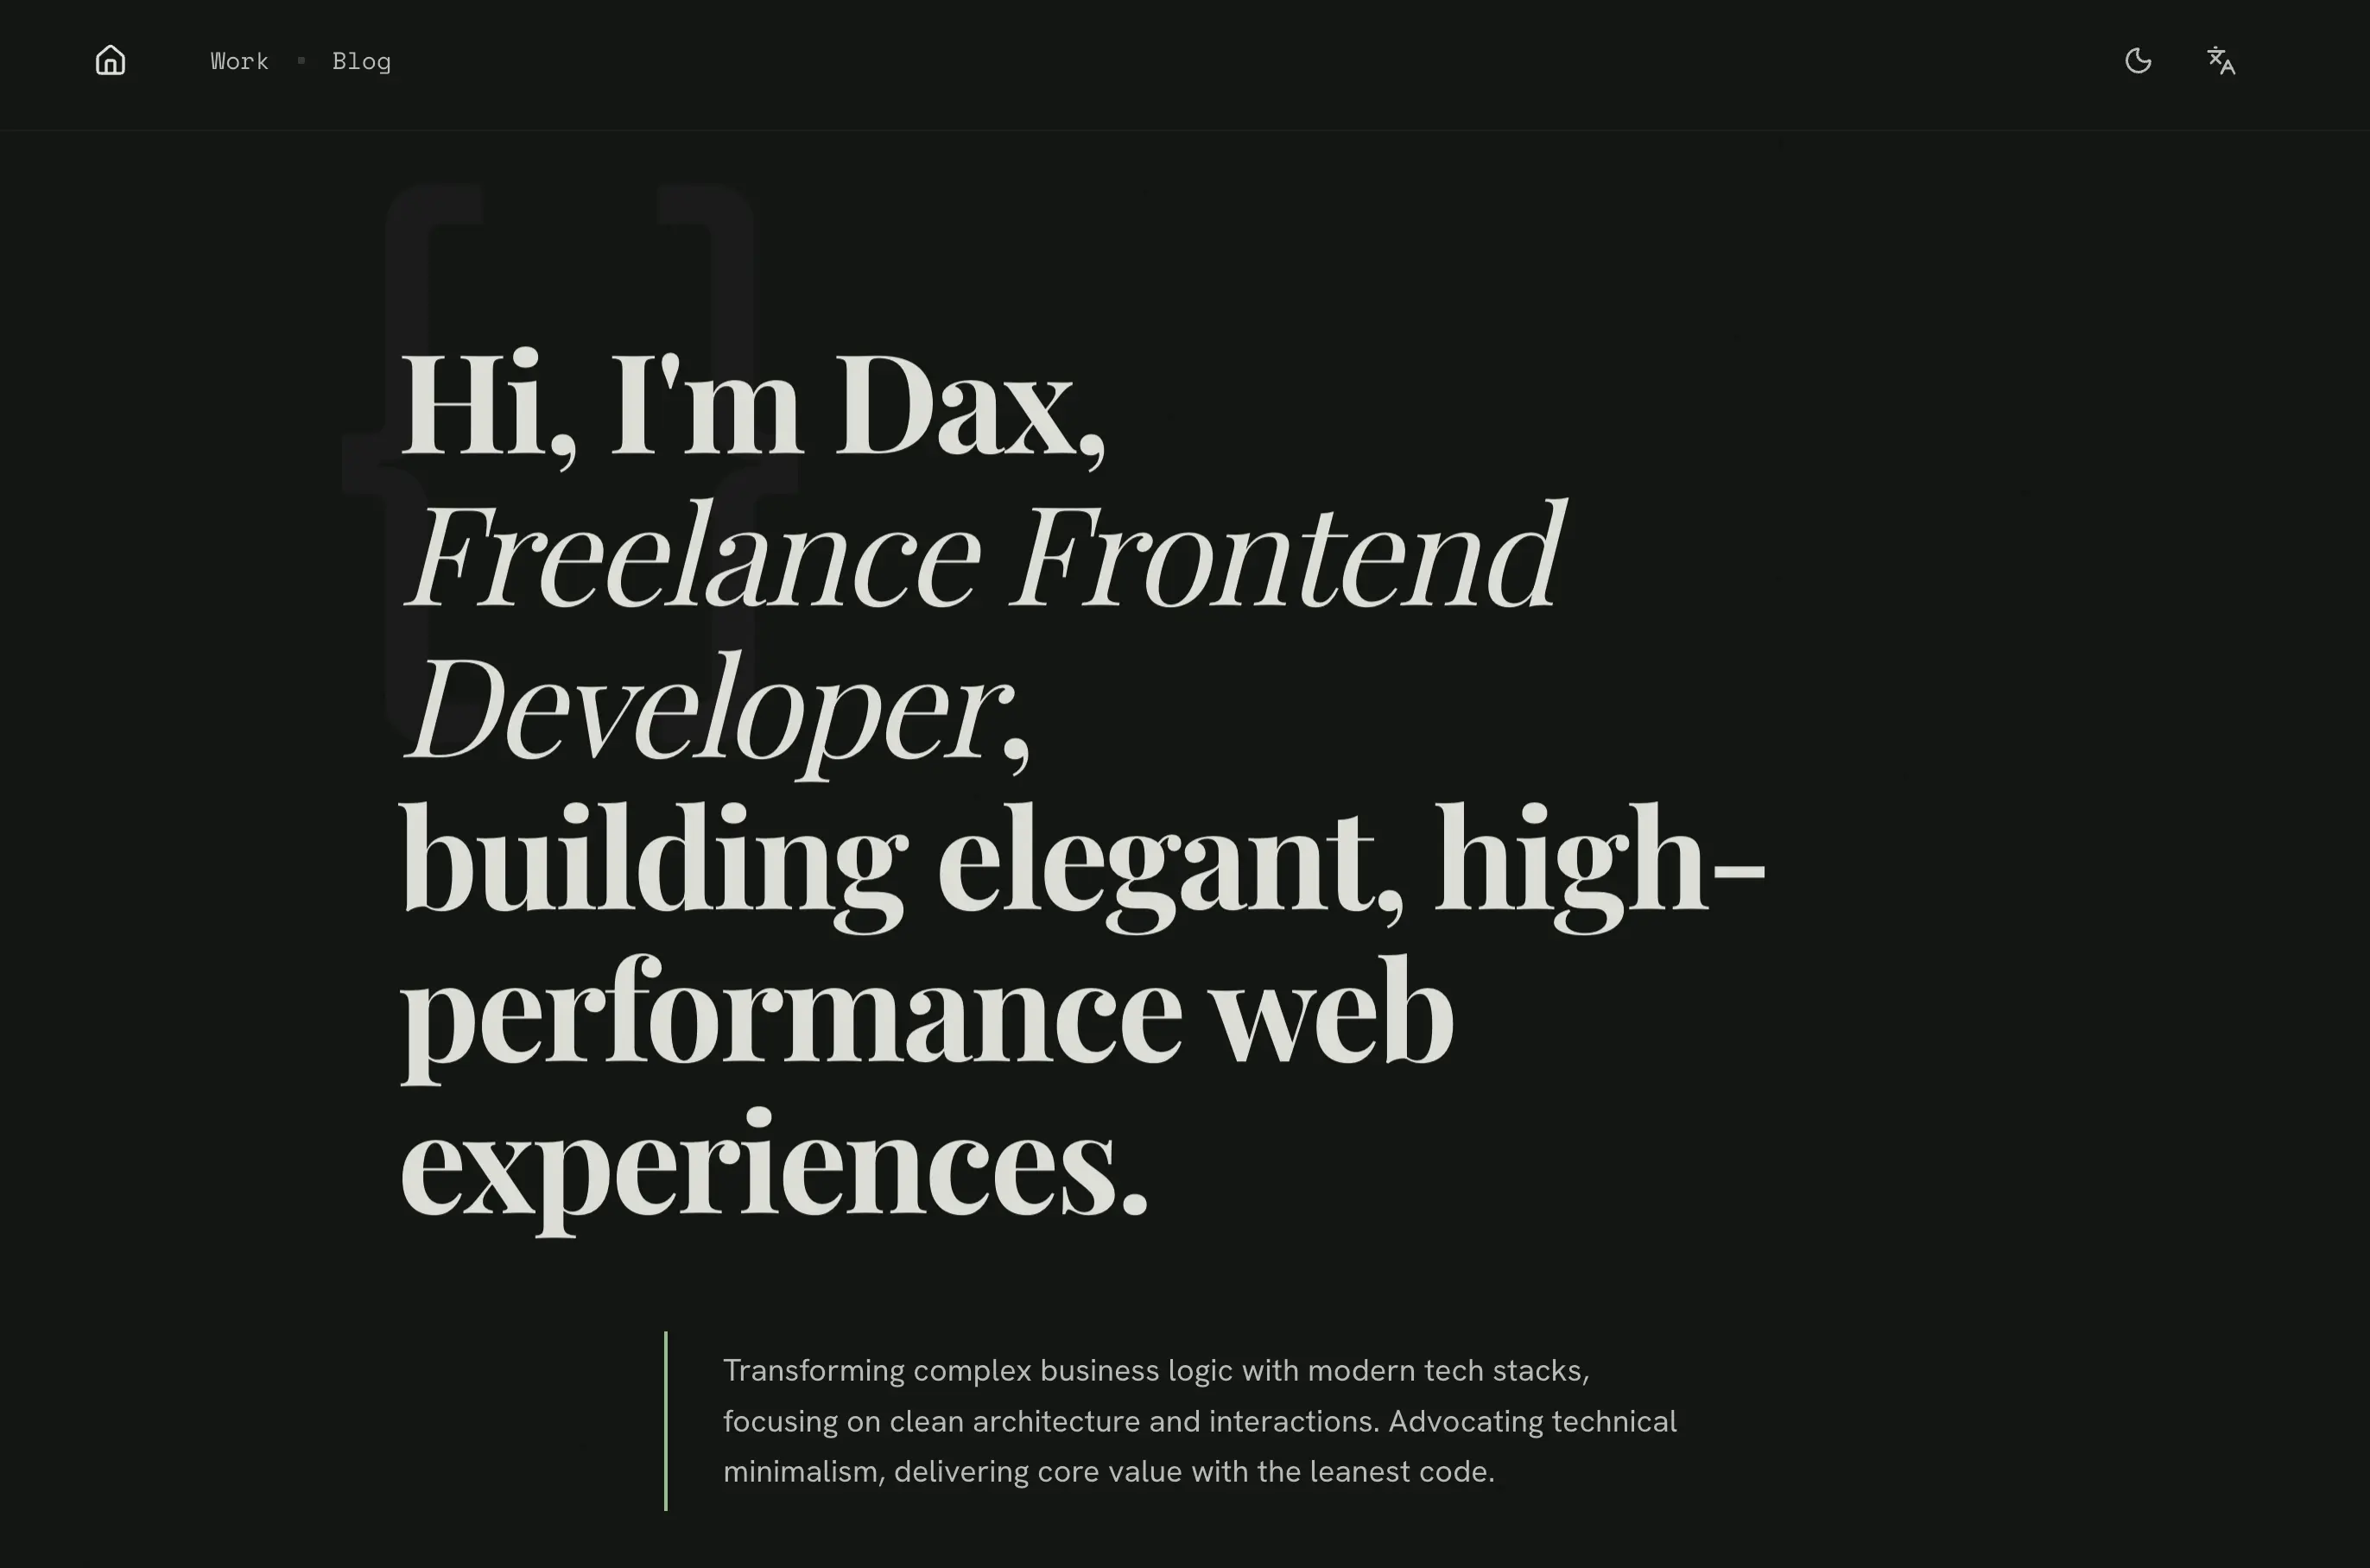
Compared to before, my ideas are more mature now. Regardless of its form, a personal homepage needs to focus on a few key points: 1. Service-oriented: It is not a toy, nor an artwork, but a medium for personal promotion; 2. High performance; 3. SEO-friendly. The new version has been enhanced in all these aspects.
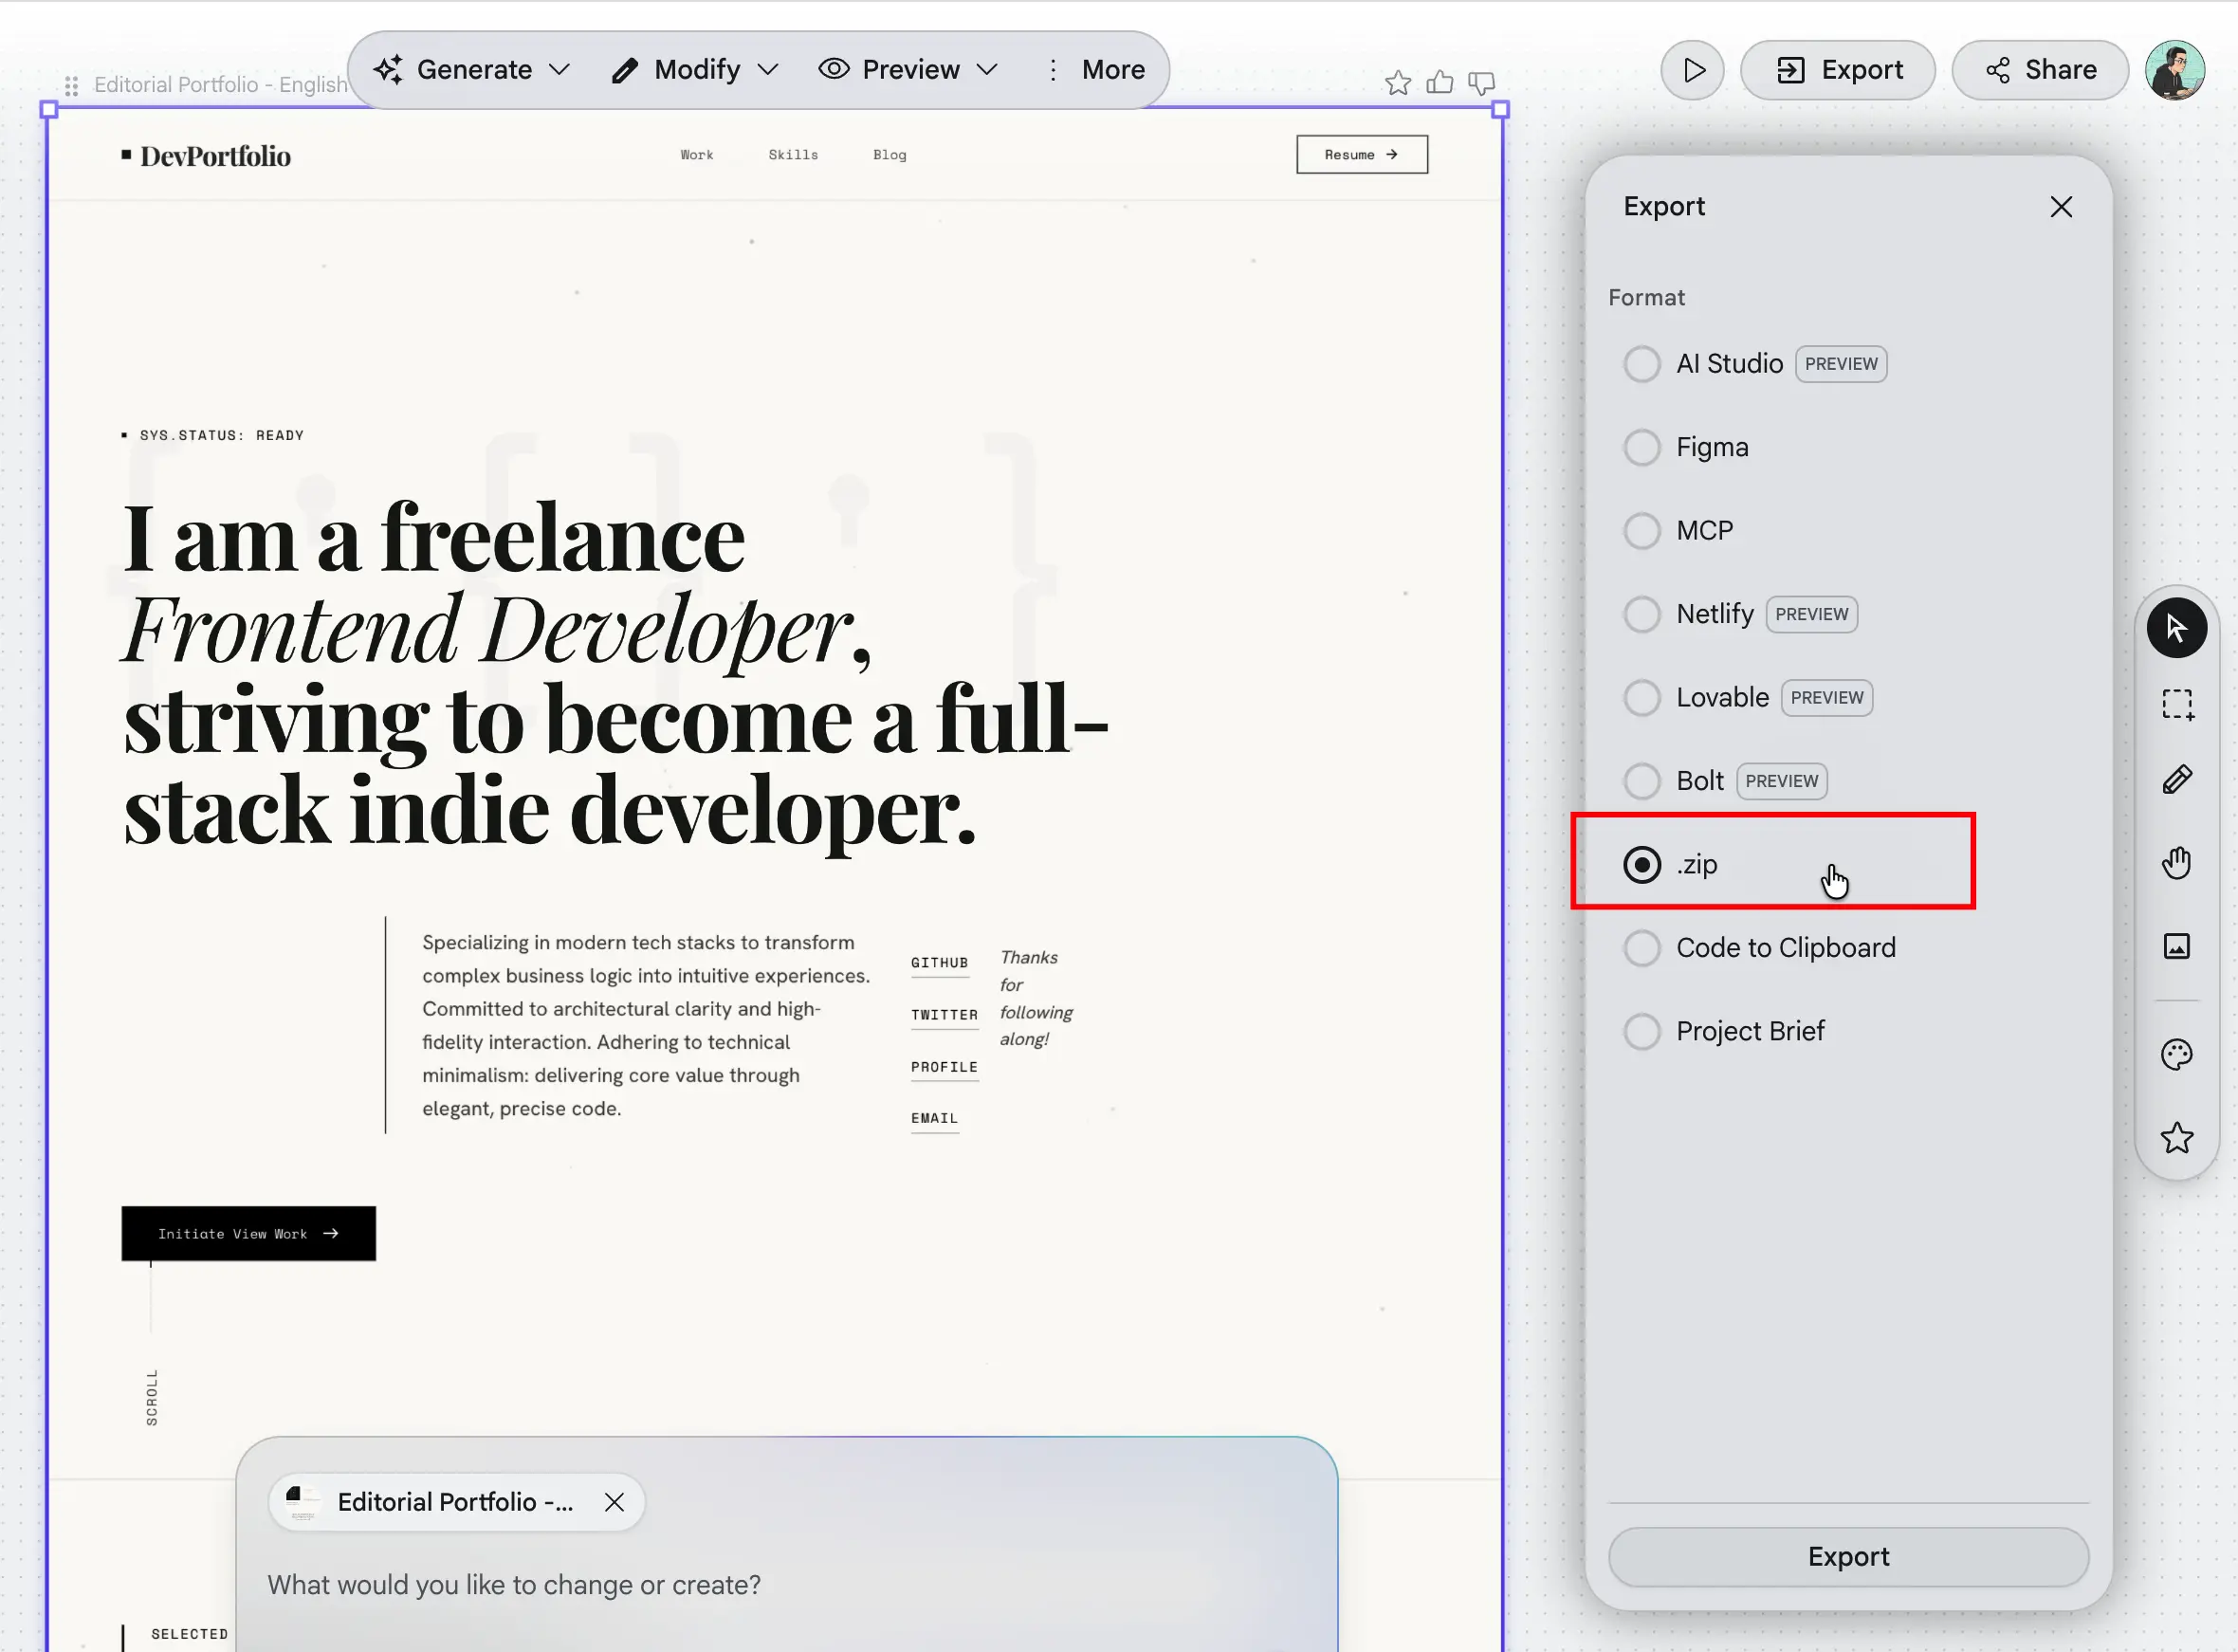
1. UI Design: Using Stitch to Design and Export Code
I still used Stitch to complete the product design. If no designers are involved, I recommend exporting the zip directly, which will generate HTML based on the design. Compared to generating design software formats and then exporting, directly converting HTML into the target tech stack webpage is actually more accurate and easier.
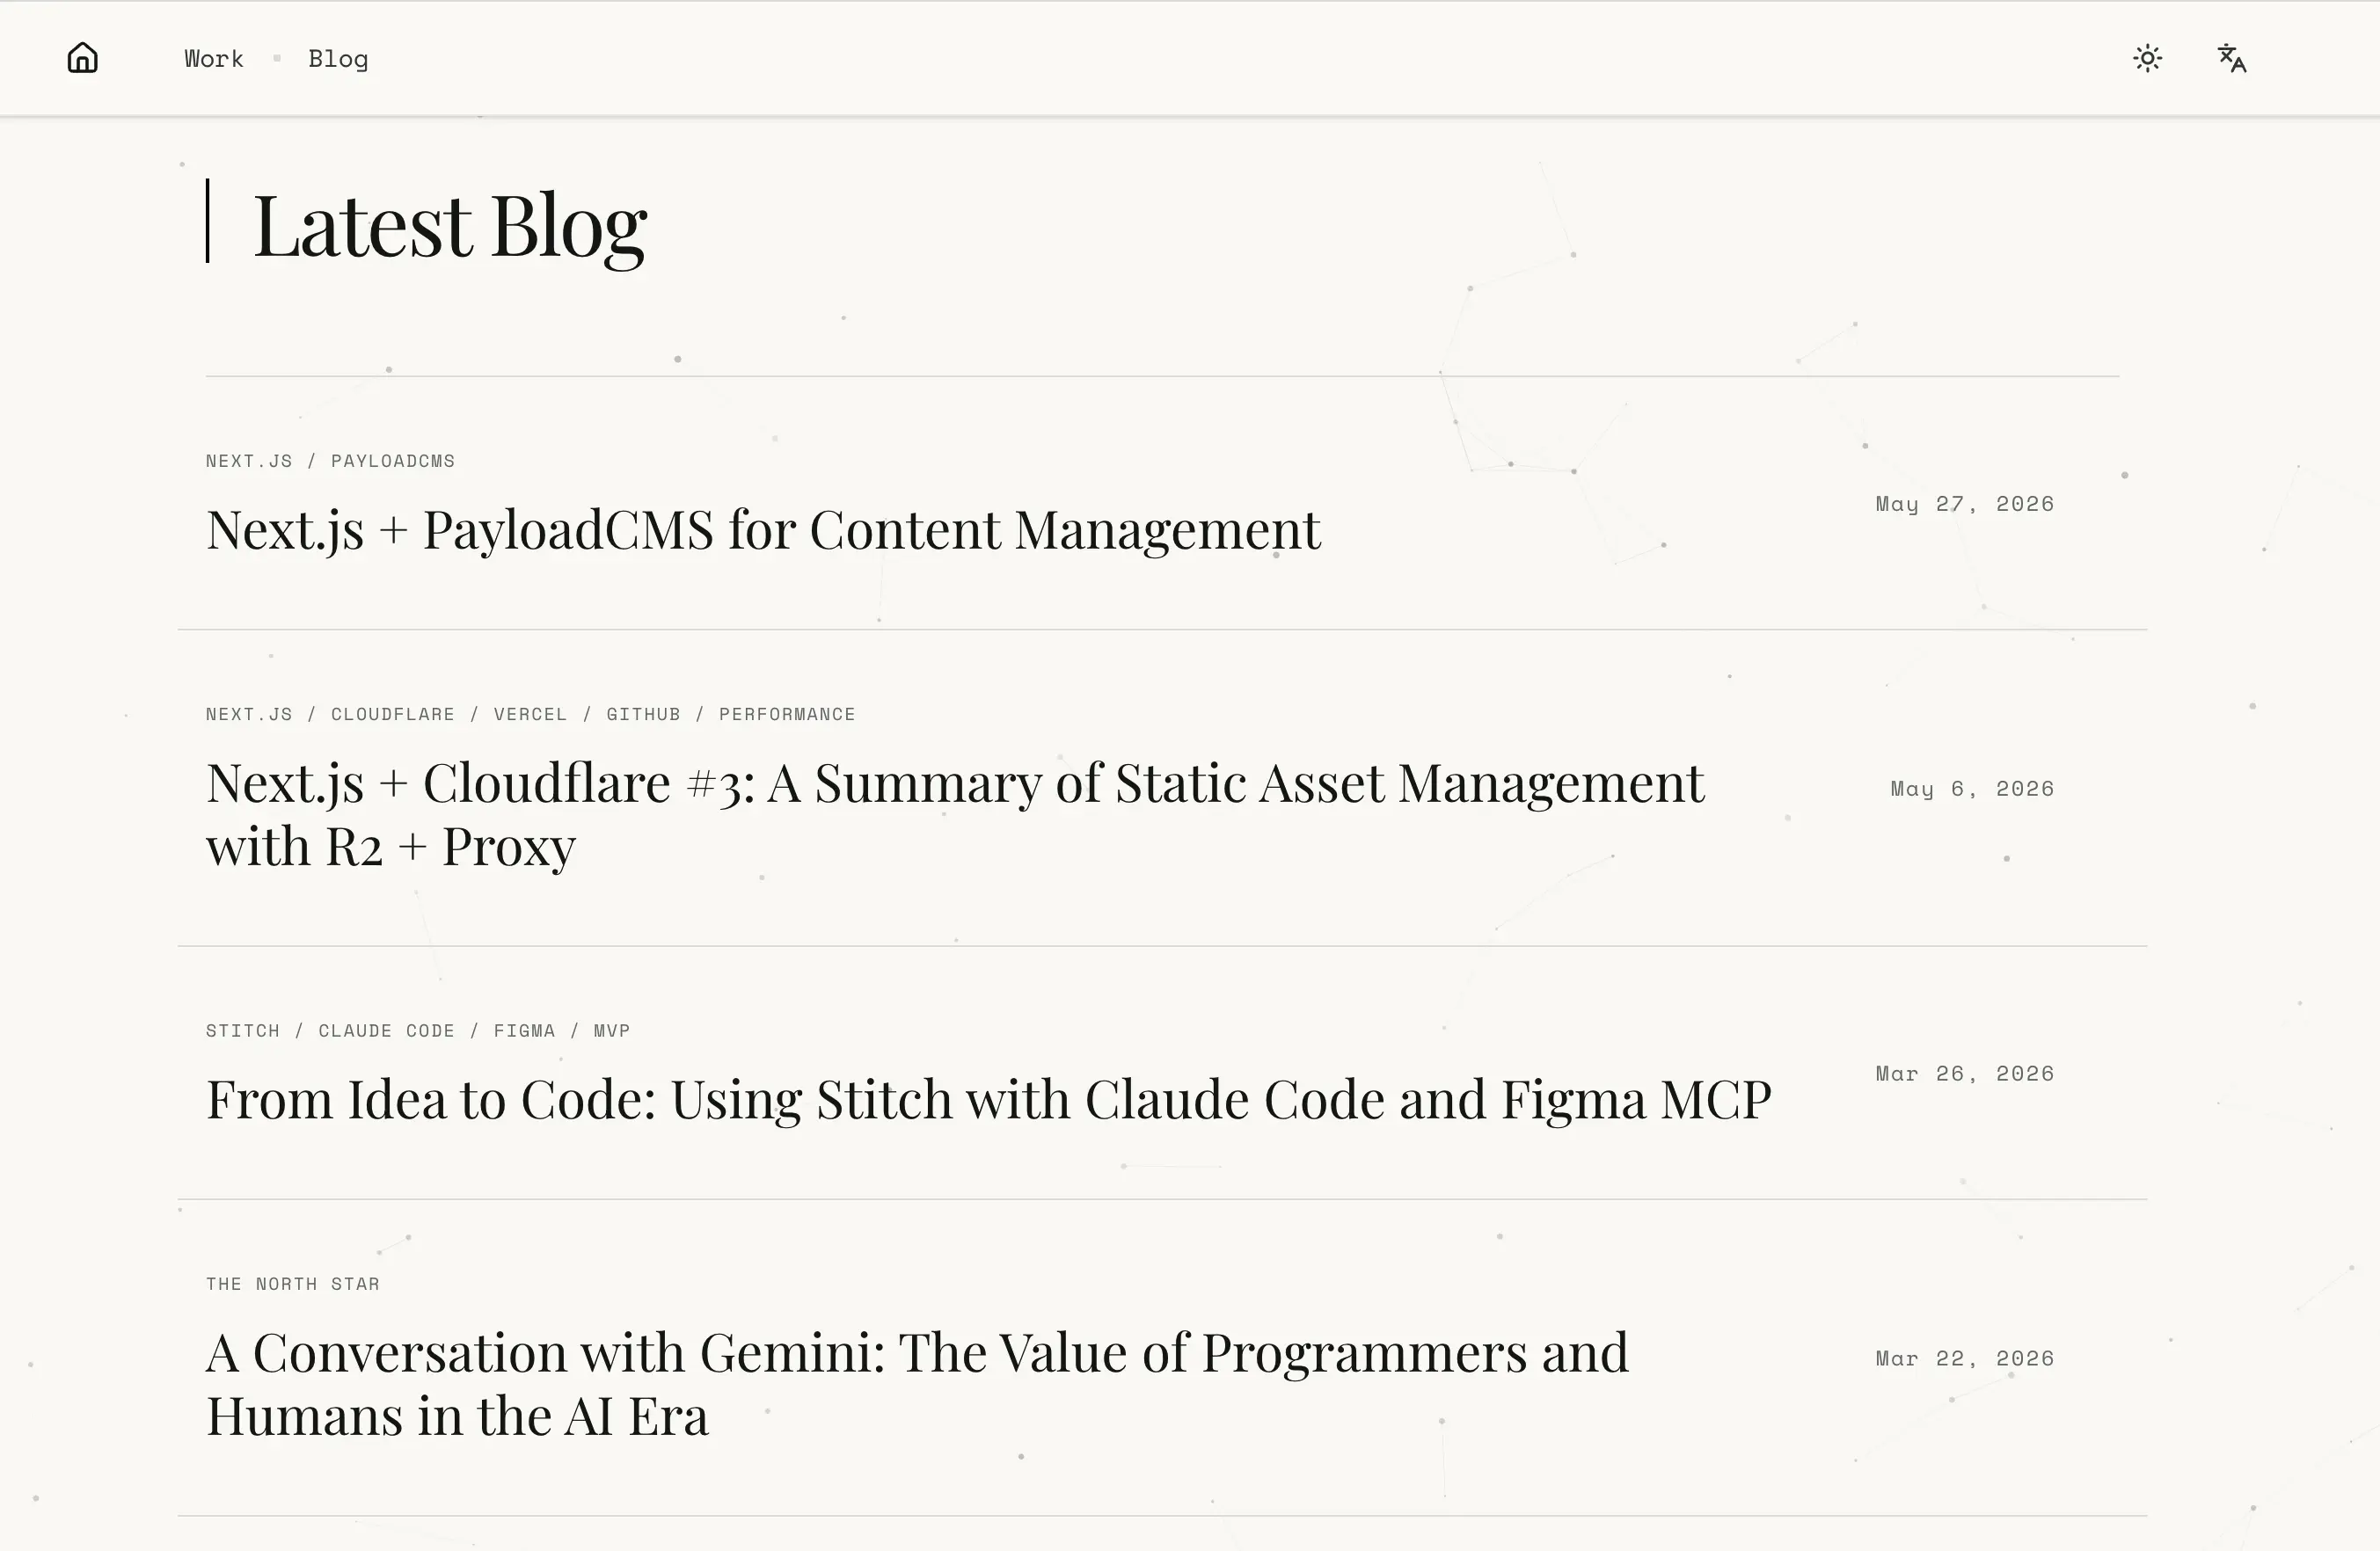
2.Information Aggregation: Server Components Calling APIs to Aggregate Personal Portfolios and Blogs
The new version’s portfolios come from the demo.daolanx.com API, and the blogs come from the daolanx.me API. By calling interfaces through Server Components and wrapping the outer layer with Suspense, it achieves better access speeds and SEO performance.
<main className="pt-20">
  ...
  <Suspense fallback={<PortfoliosSkeleton />}>
    <Portfolios />
  </Suspense>
  <Suspense fallback={<ArticlesSkeleton />}>
    <Articles />
  </Suspense>
  ...
</main>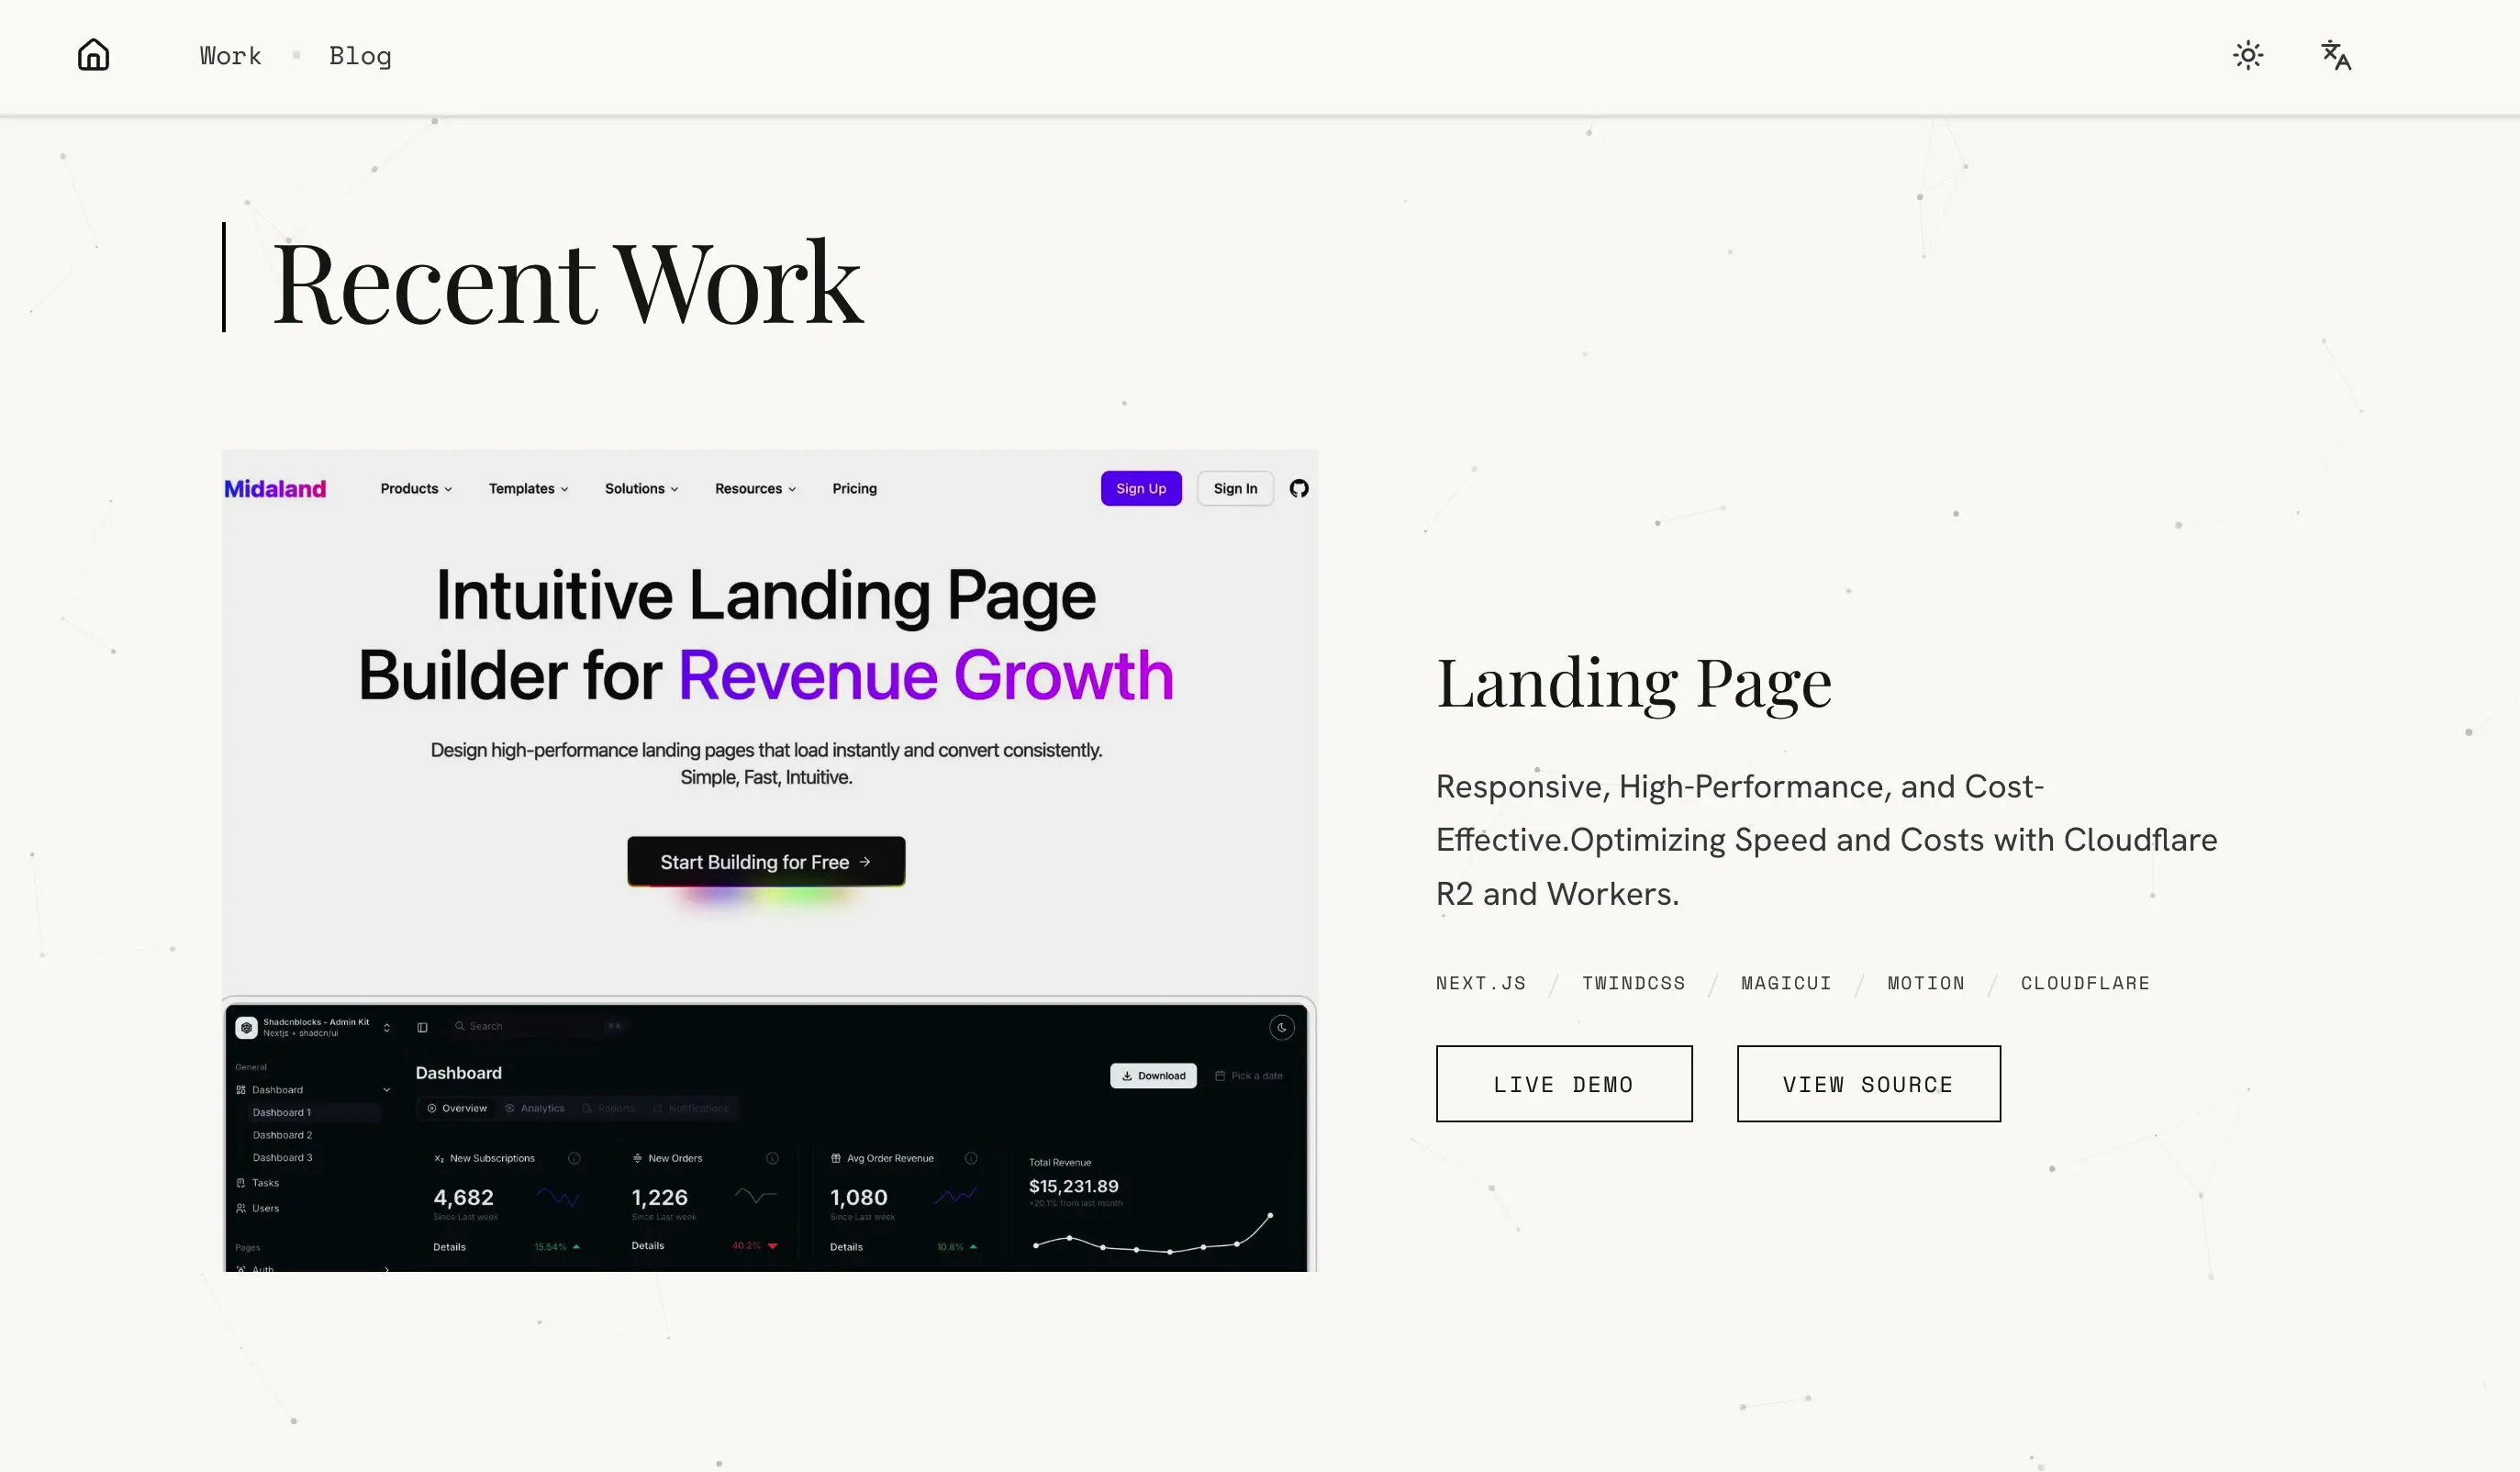
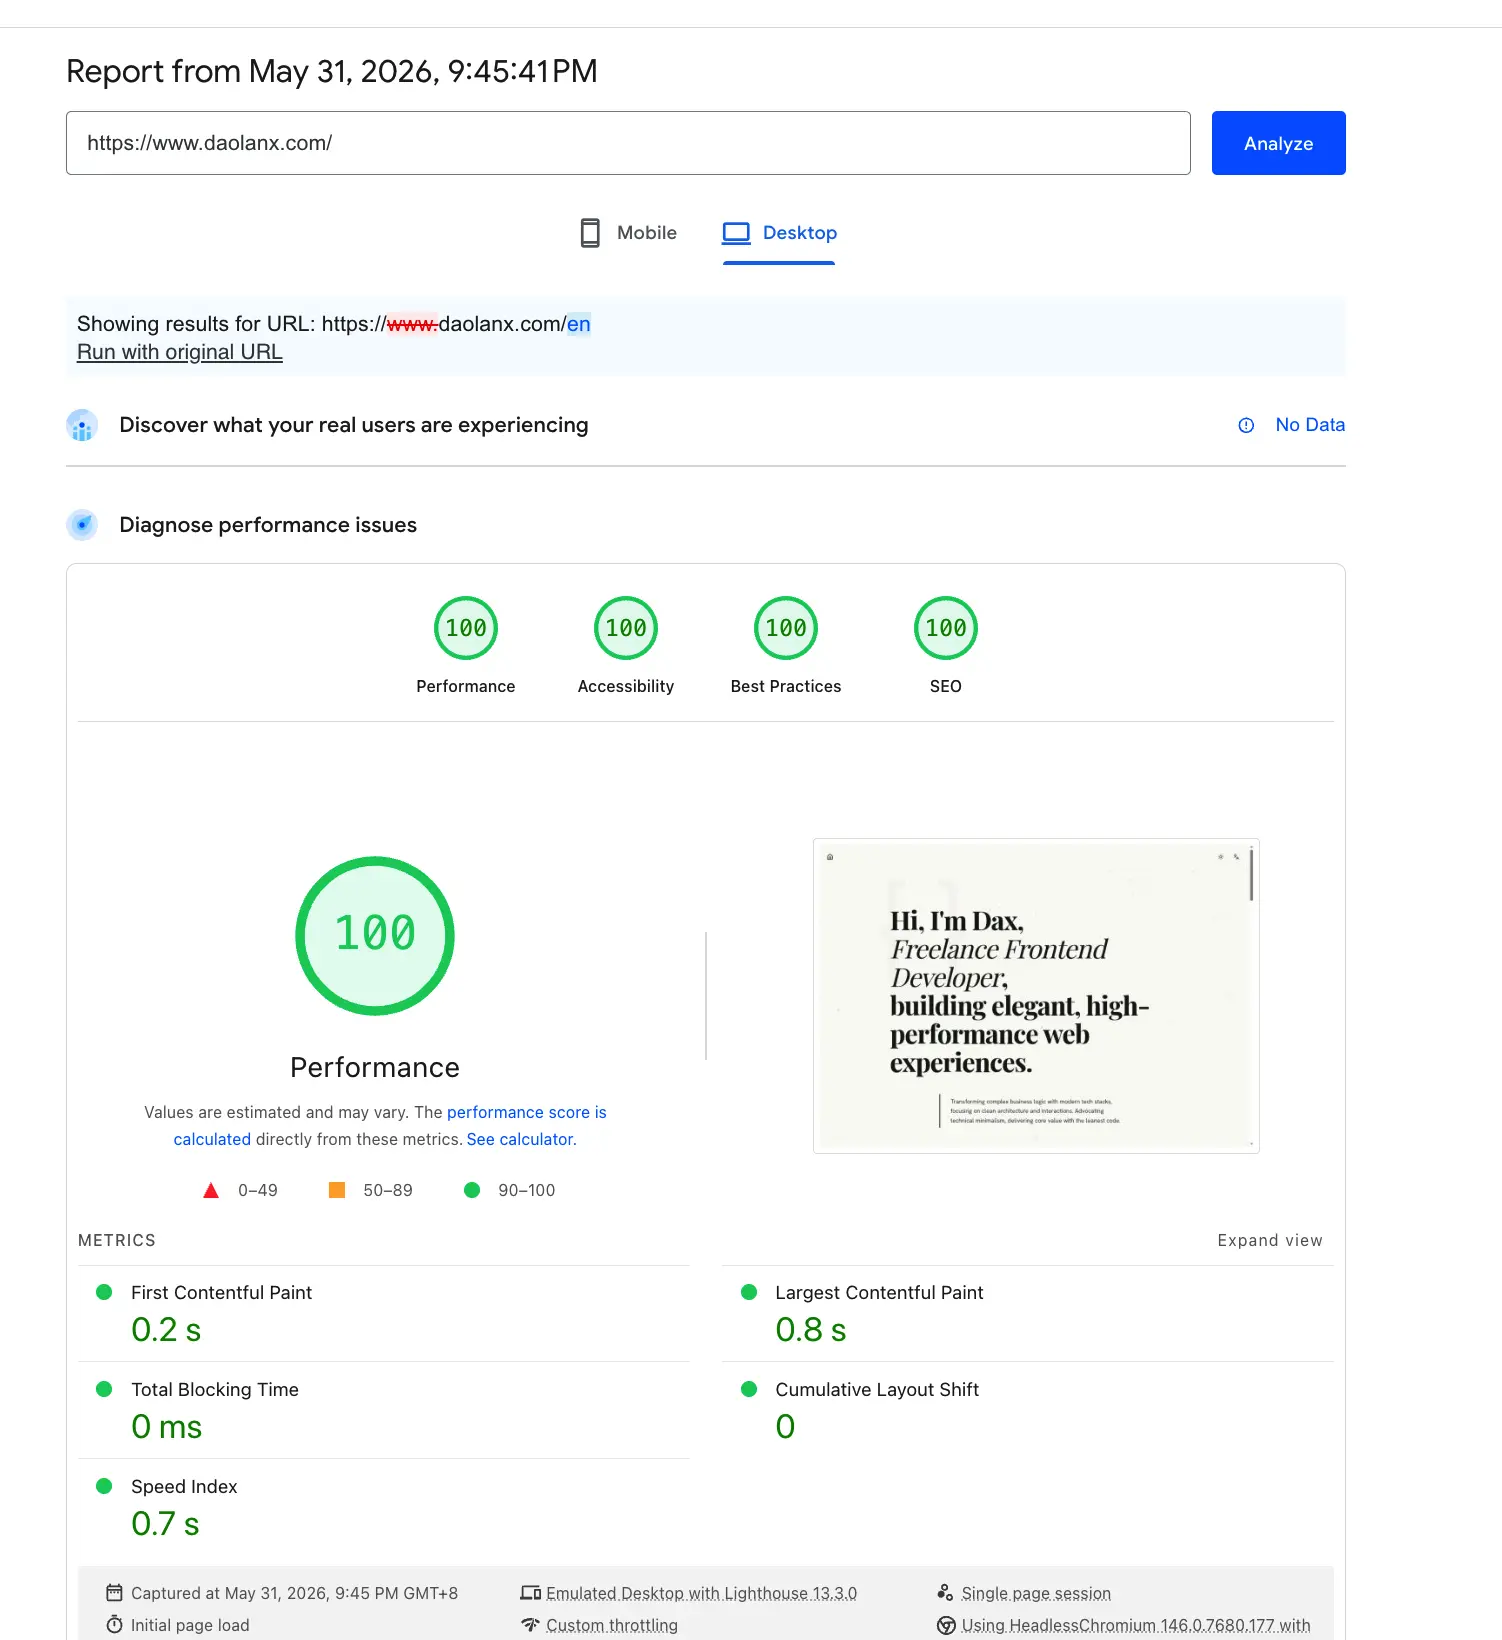
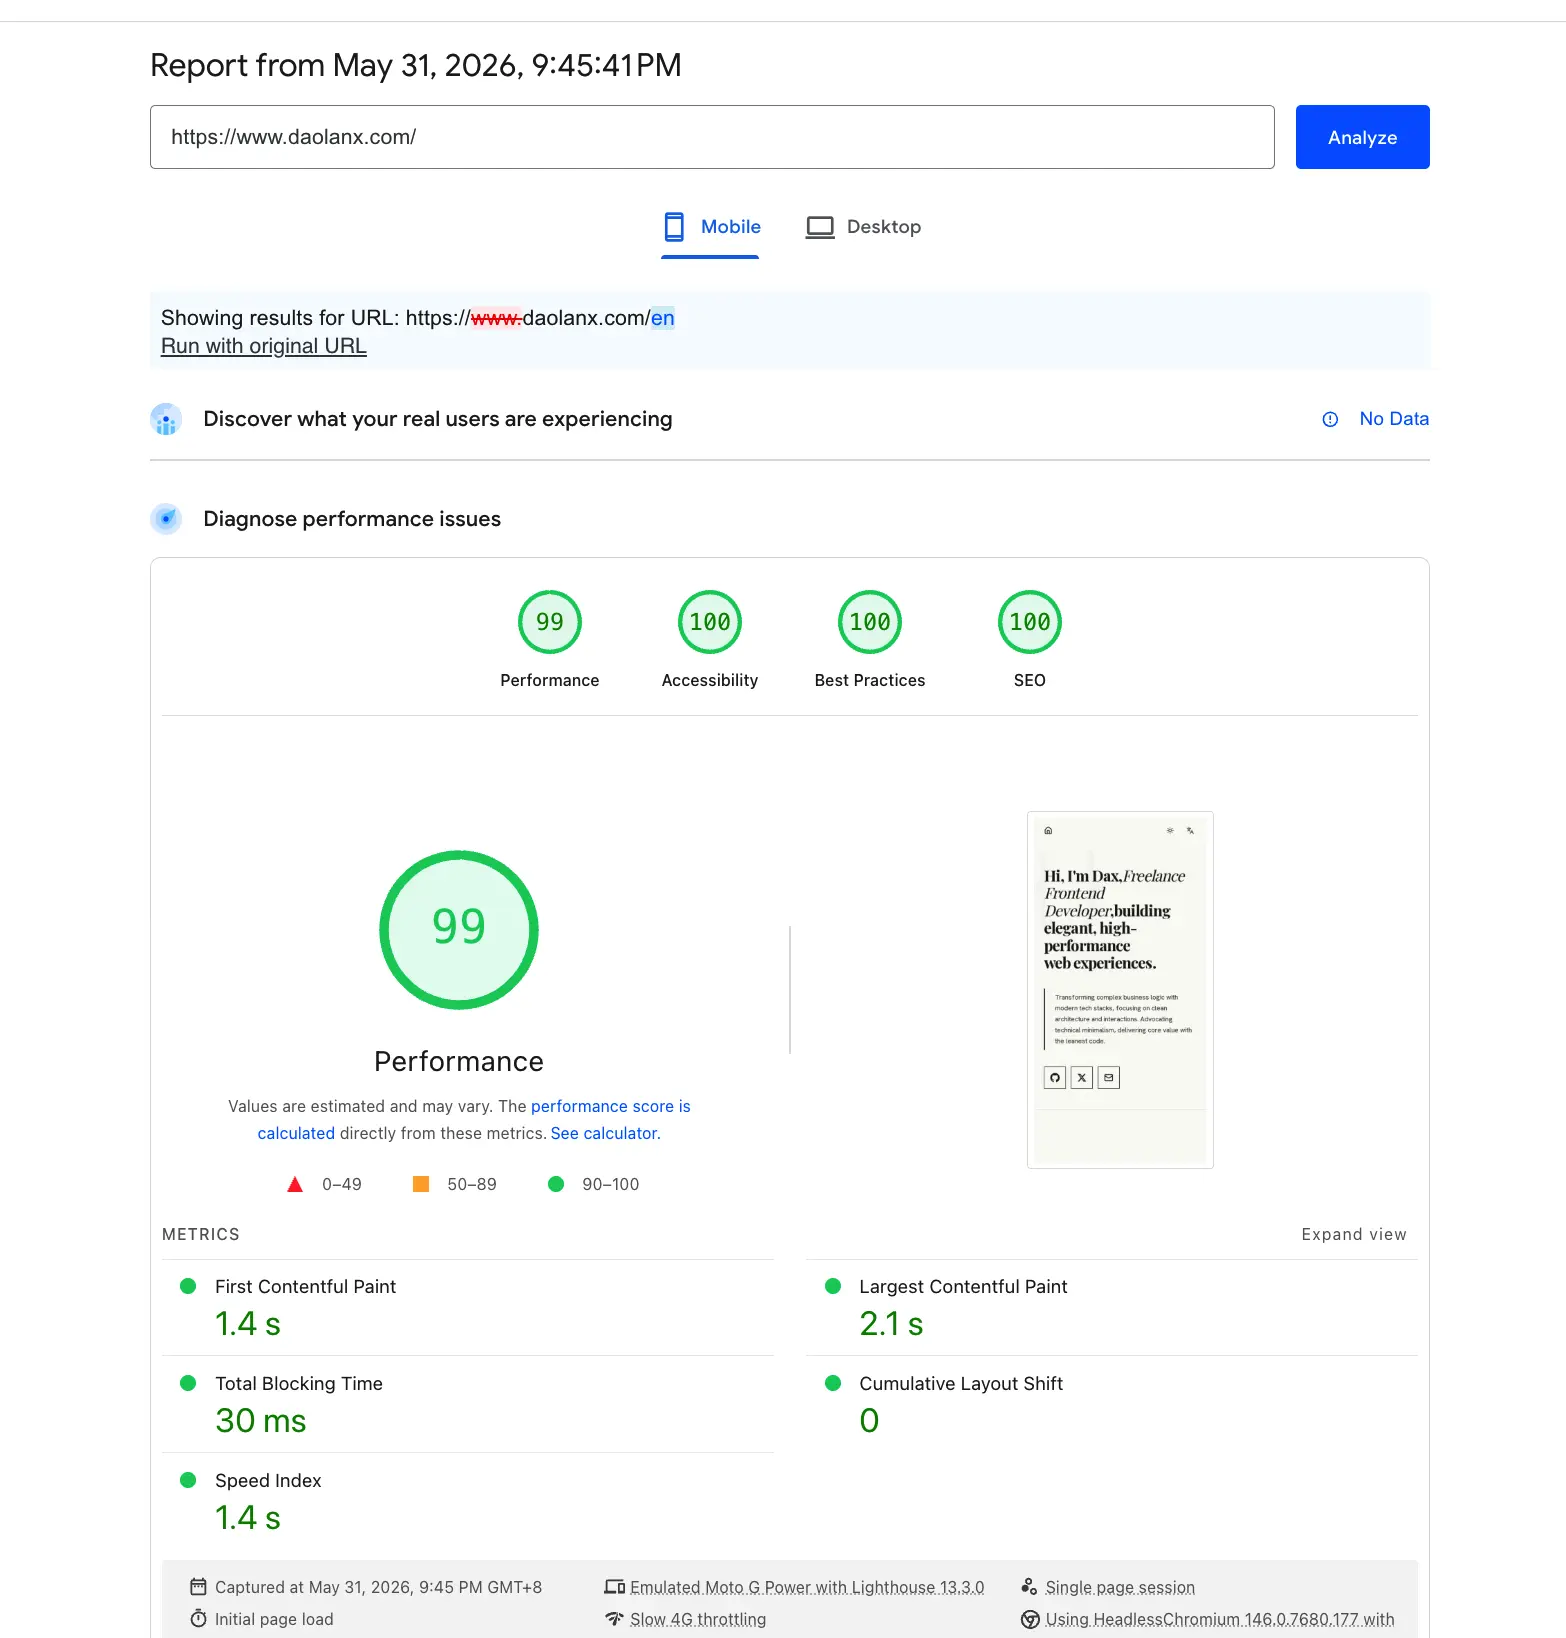
3. Performance Optimization: Lighthouse from 70+ to 90+
3.1 Before and After Optimization Comparison
Mediocre performance before optimization
The code generated by AI could basically reach a runnable state, but the performance score was around 70+.
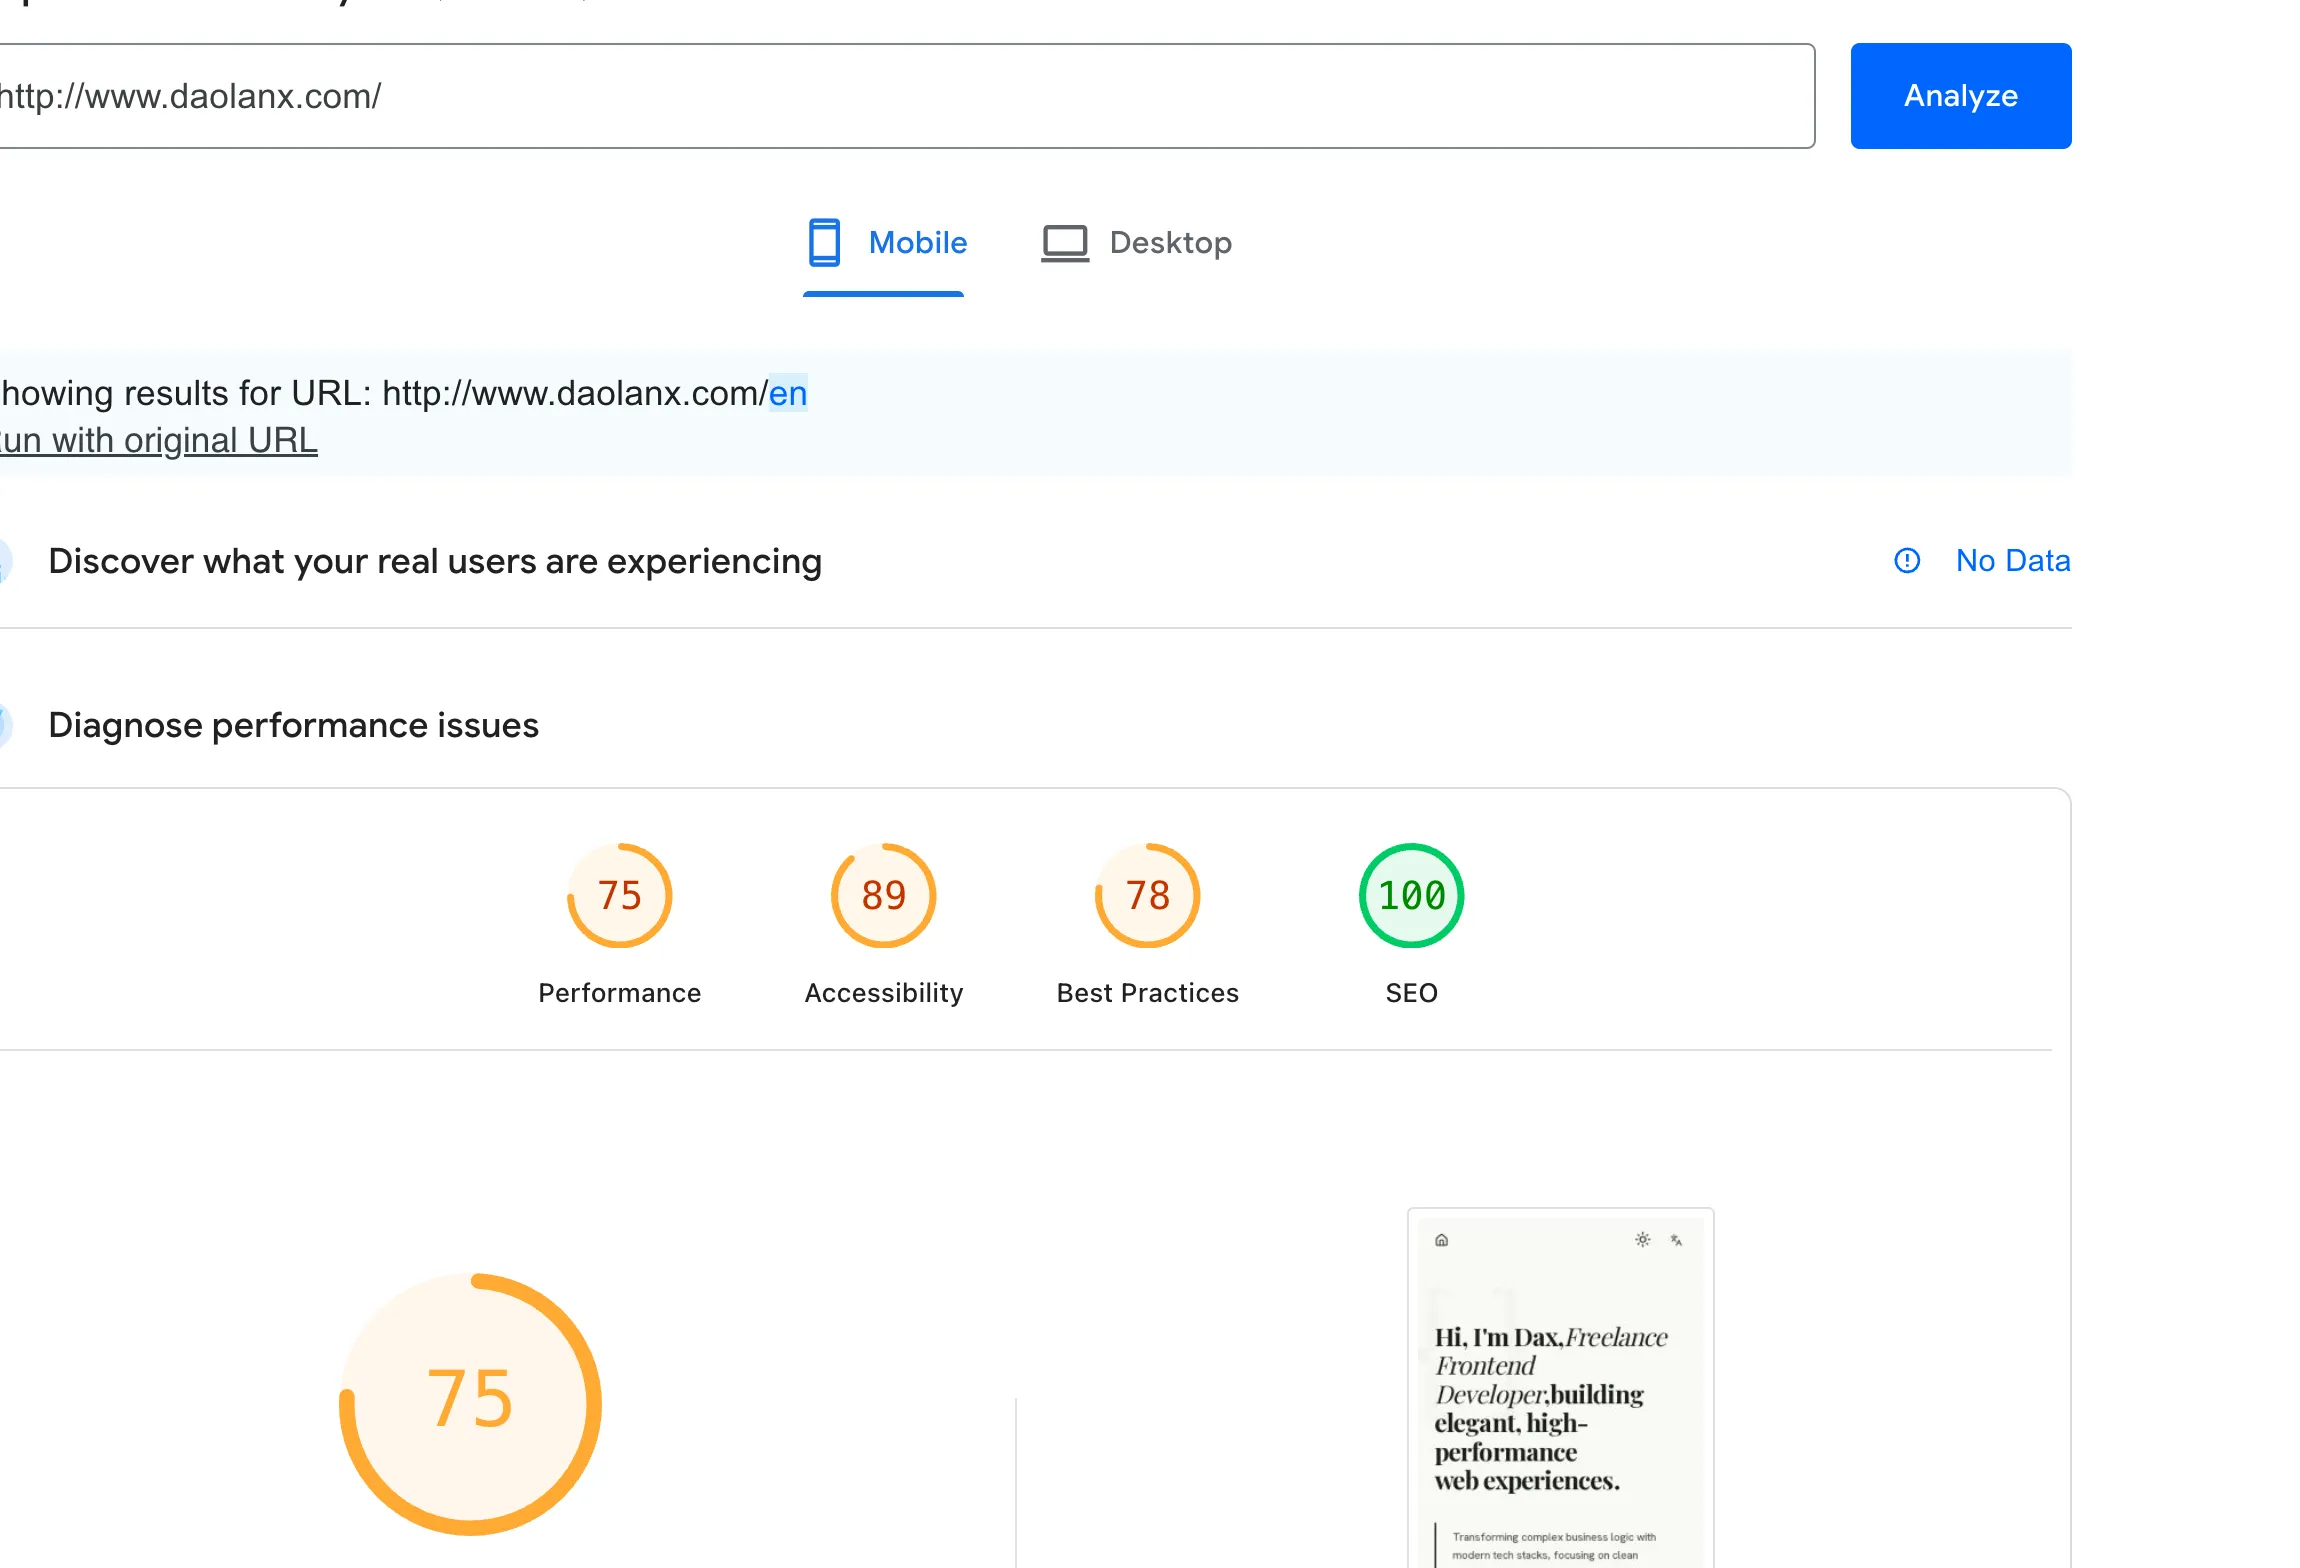
90+ after optimization
To achieve higher performance, a series of adjustments needed to be made. You can refer to Lighthouse , which provides a lot of useful advice.
3.2 Loading Performance Optimization (Loading)
Goal: Shorten the fetch and render time of critical resources, prioritizing the loading speed of above-the-fold content.
- Eliminated LCP detection delays caused by animations: Removed the
opacity: 0(FadeIn) fade-in animation of elements in the Hero section. Previously, this hidden effect would passively delay Lighthouse’s LCP timer. - Preloading core images: Added the
priorityattribute to the Portfolio collection images above-the-fold, forcing the browser to prioritize establishing data channels and preloading. - Precise image distribution: Re-optimized
deviceSizesandimageSizesconfigurations to ensure that different devices can get perfectly adapted images for their resolutions, avoiding bandwidth waste. - Native image component upgrade: Replaced all native
<img>tags withnext/image, combined withfill+sizesattributes to achieve responsive loading while locking the image placeholder to prevent page layout shifts or jitters.
3.3 Rendering Performance Optimization (Rendering)
Goal: Eliminate render-blocking resources, reduce main thread burden, and ensure the timeliness of First Paint (FP).
- Lazy loading non-critical components: Adopted
next/dynamic(ssr: false) combined withrequestIdleCallbackto defer the loading ofParticleCanvasuntil the browser is completely idle. - DOM structure position adjustment: Moved
ParticleCanvasto the very bottom of the page’s HTML structure, completely removing its blocking effect on First Paint. - Skipping particle canvas on mobile: Directly skipped the loading and rendering of
ParticleCanvasby detecting viaisDesktop(), avoiding unnecessary calculations and drawing on lower-performance mobile devices. - Avoiding forced synchronous layouts (Reflow): eplaced the reading of
window.innerWidthin breakpoint.ts with thematchMediaAPI to avoid triggering forced synchronous layouts; additionally, cached size variables in the canvas’s animation loop to prevent frequent DOM reads from causing browser reflows.
3.4 Visual Stability Optimization (Visual Stability)
Goal: Eliminate Cumulative Layout Shift (CLS) and resolve flickering and jumping issues caused by font loading.
- Tailwind theme standardization: Unified the calling of CSS variables from
next/fontin the Tailwind configuration to control the font family, ensuring efficient and consistent rendering.
3.5 SEO Optimization (Search Engine Optimization)
Goal: Ensure search engines correctly index multilingual pages to improve discoverability and ranking performance in international markets.
- Dynamic Canonical URLs: eplaced the hardcoded
/with dynamic paths based on the current language (e.g.,/en,/zh), ensuring each language version has an independent canonical address to prevent search engines from treating multilingual pages as duplicate content. - hreflang multilingual tags: Generated
<link rel="alternate" hreflang="...">tags for each language version through thealternates.languagesconfiguration to inform search engines of the relationship between language versions, ensuring users see the correct language version for their region in search results.
3.6 Accessibility
Goal: Guarantee a complete access experience for users with low vision and users of assistive technologies.
- Allowing user zooming: Removed
maximumScale: 1from the viewport configuration to restore the browser’s native zoom capabilities, providing necessary magnification support for users with low vision. - Semantic Logo links: Added
aria-label="Dax - Home"to the site’s Logo link so screen reader users can clearly identify the purpose of this link when navigating. - Accessible labeling for project links: Added independent
aria-labelsto the “Live Demo” and “View Source” links for each project, ensuring that the specific project the link points to is accurately conveyed even when read out of context.
4. Deployment
4.1 Why OpenNext
The deployment platform officially recommended by Next.js is Vercel, but for personal projects, Vercel’s free tier and pricing aren’t always the optimal solution. Cloudflare Workers offers a global edge network, a generous free tier, and extremely low cold start times, making it a great alternative.
The problem is: Next.js relies on the Node.js runtime, while Cloudflare Workers runs on the V8 engine. There are fundamental compatibility differences between the two.
OpenNext was created to solve this very problem. It is an open-source adapter capable of converting Next.js build artifacts into a format compatible with Cloudflare Workers, allowing your Next.js application to be deployed directly to Cloudflare’s edge network.
OpenNext provides an official Getting Started Guide that covers the basic flow of installation, configuration, and deployment. This article won’t repeat those details, but rather share the details to note and the pitfalls encountered when using OpenNext in an actual project.
4.2 Package Configuration
Dependencies
Install two core dependencies:
{
  "dependencies": {
    "@opennextjs/cloudflare": "1.14.0",
    "next": "16.0.7"
  },
  "devDependencies": {
    "wrangler": "4.56.0"
  }
}@opennextjs/cloudflare: The core adapter responsible for converting Next.js build artifacts into the Cloudflare Worker format.next: The Next.js framework itself.wrangler: Cloudflare Workers CLI, used for deployment (version must be ≥ 3.99.0).
Script Configuration
{
  "scripts": {
    "dev": "next dev",
    "build": "next build",
    "preview": "opennextjs-cloudflare build && opennextjs-cloudflare preview",
    "deploy": "opennextjs-cloudflare build && opennextjs-cloudflare deploy",
    "cf-typegen": "wrangler types --env-interface CloudflareEnv env.d.ts"
  }
}
A few key scripts explained:
pnpm dev: Local development server using Next.js dev mode with fast hot reload. TheinitOpenNextCloudflareForDev()innext.config.tsbridges Cloudflare bindings.pnpm build: Standard Next.js build that generates the.next/directory. This is a prerequisite forpreviewanddeploy.pnpm preview: Runsopennextjs-cloudflare buildto generate Worker-compatible output, then simulates the Cloudflare Worker environment locally. Use this to verify compatibility before shipping.pnpm deploy: Builds first, then deploys to Cloudflare Workers. For production use.pnpm cf-typegen: Generates TypeScript type definitions fromwrangler.jsoncintoenv.d.ts, ensuring type hints for Cloudflare bindings.
4.3 Local Dev vs Preview: Two Modes
OpenNext provides two local runtime modes:
| Mode | Command | Purpose |
|---|---|---|
| Dev mode | pnpm dev | Daily development, fast hot reload |
| Preview mode | pnpm preview | Pre-release verification, simulating the real Worker environment |
Recommendation: Use pnpm dev for daily development, and use pnpm preview to verify before publishing. The preview mode genuinely simulates Cloudflare’s runtime environment and can uncover issues that wouldn’t appear in development mode.
4.4 Corresponding Build and Deployment Configurations on the Cloudflare Platform Dashboard
- Build:
npx opennextjs-cloudflare build
Dedicated to the Cloudflare Dashboard CI pipeline. Internally, OpenNext will automatically runnext buildfirst to generate the.next/artifact, and then convert it into a format compatible with Cloudflare Workers. Once the Build is complete, the platform automatically takes over the deployment process, with no manual trigger required for upload. - Deploy:
npm run deploy
Used for local manual deployment. Equivalent to executingopennextjs-cloudflare build && opennextjs-cloudflare deploy, which completes the build conversion and uses wrangler to push to Cloudflare Workers sequentially in a single command, ideal for developers verifying releases on their local machines.
4.5 Image Optimization: Custom Loader is Required
Cloudflare Workers cannot run Sharp (Next.js’s default image optimization library), so you need to provide a custom image loader:
// src/lib/image-loader.ts
export default function imageLoader({
  src,
  width,
  quality,
}: {
  src: string
  width: number
  quality?: number
}) {
  const params = new URLSearchParams()
  params.set("w", String(width))
  if (quality) params.set("q", String(quality))
  return `${src}?${params.toString()}`
}
Then configure it in next.config.ts:
images: {
  loader: "custom",
  loaderFile: "./src/lib/image-loader.ts",
}
Best Practices for Production Environments:
Host static assets on Cloudflare R2 storage buckets and bind a custom domain (like assets.yourdomain.com), pointing the image URL directly to R2’s public access endpoint. R2 is on the same network as the Cloudflare CDN, so image requests are responded to directly from edge nodes without needing to return to the origin, inherently possessing global low-latency distribution capabilities. At the same time, R2 waives egress traffic fees, making it suitable for high-frequency image loading scenarios.
The final src path looks like this:
https://assets.yourdomain.com/portfolio/project-01.webp?w=1200&q=80R2 is responsible for storage and distribution, the custom Loader is responsible for concatenating size and quality parameters, and the Next.js Image component handles responsive sizes and placeholder layouts. Each of the three performs its own duties, fully replacing Sharp’s runtime image processing capabilities.