Setting Up a Free Custom Domain Email with Resend + Cloudflare + Gmail
From a product perspective, having an email address with a custom domain is essential—it looks far more professional and formal than a personal email. While Google Workspace and Microsoft 365 offer complete and professional enterprise email capabilities, as indie developers, we need to be budget-conscious. Depending on the product’s current stage, there are plenty of highly cost-effective alternatives available.
This post documents how to implement a custom domain email using Resend, ultimately achieving a seamless setup to send and receive custom domain emails right inside your personal Gmail account.
1. Demo
1.1 Receiving Emails: Custom Domain Emails Received via Personal Gmail
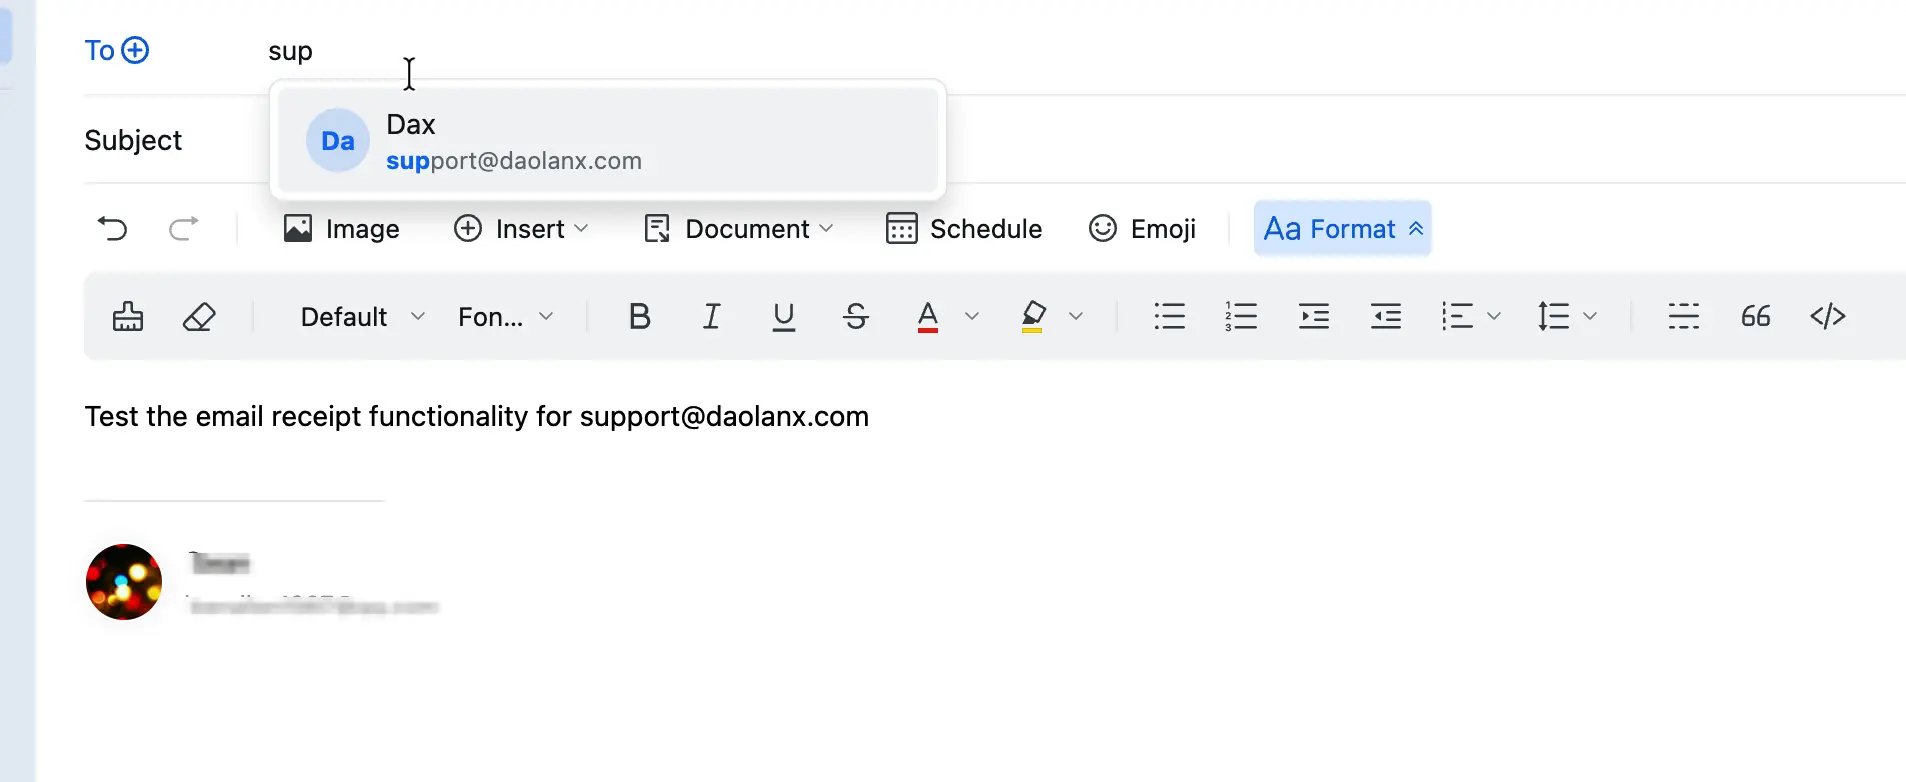
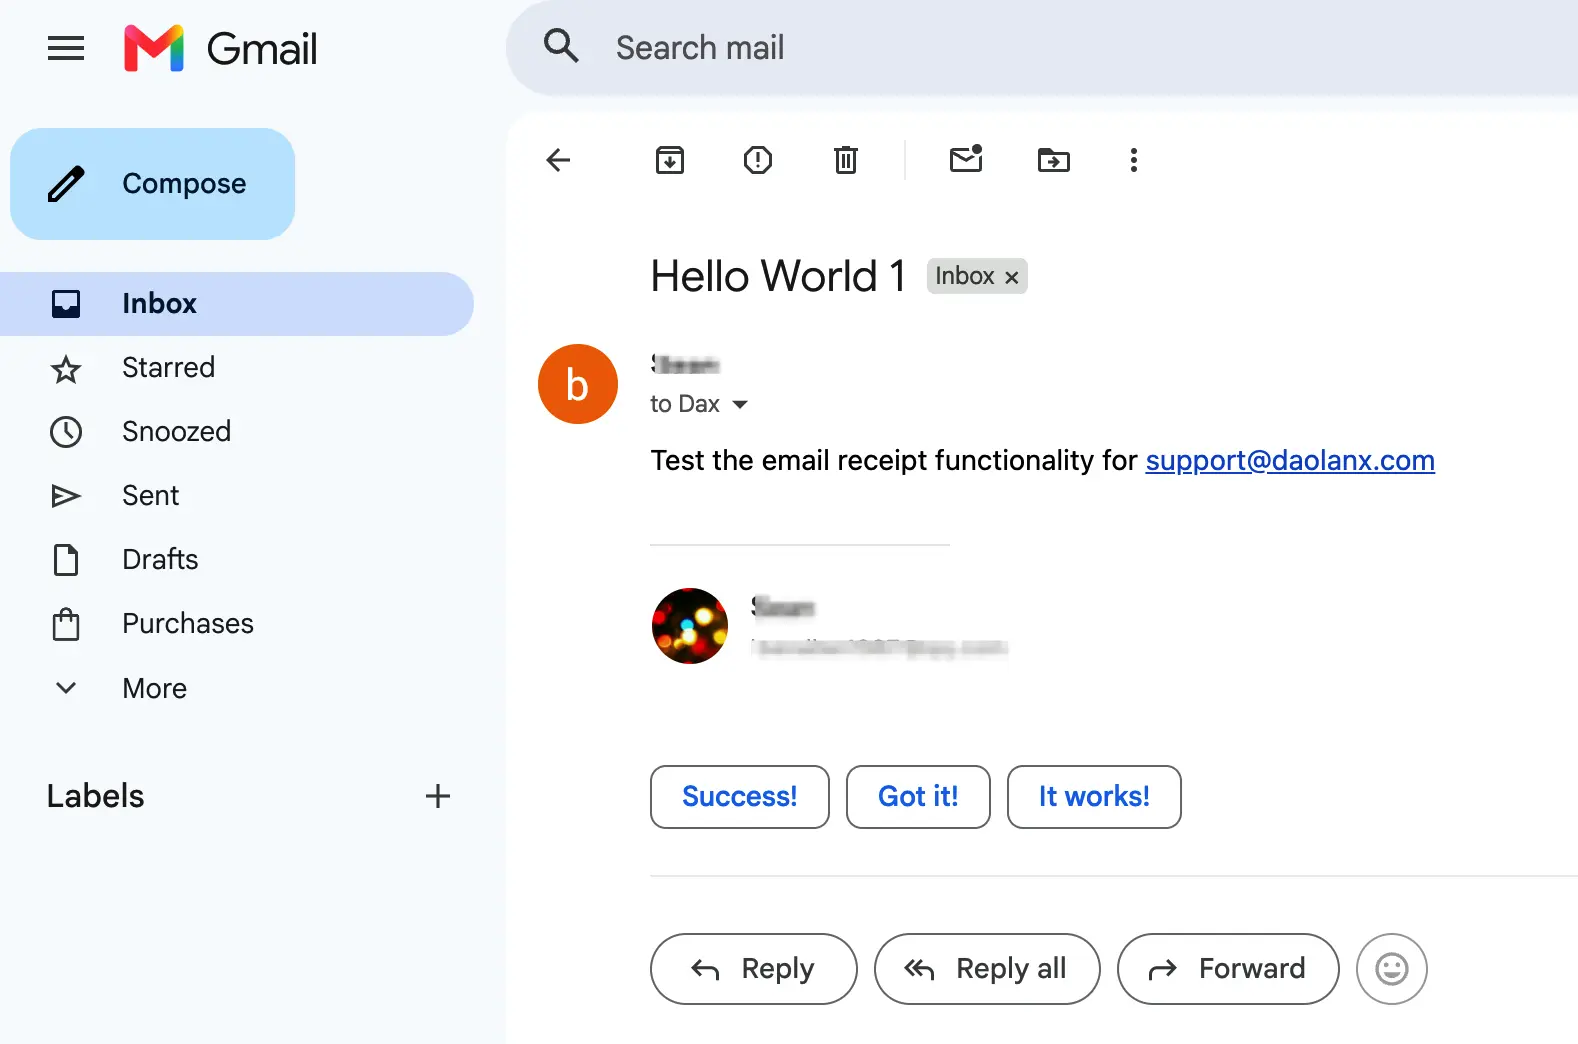
Write an email using a personal account and send it to support@daolanx.com. The personal Gmail linked to the custom domain will successfully receive this email.
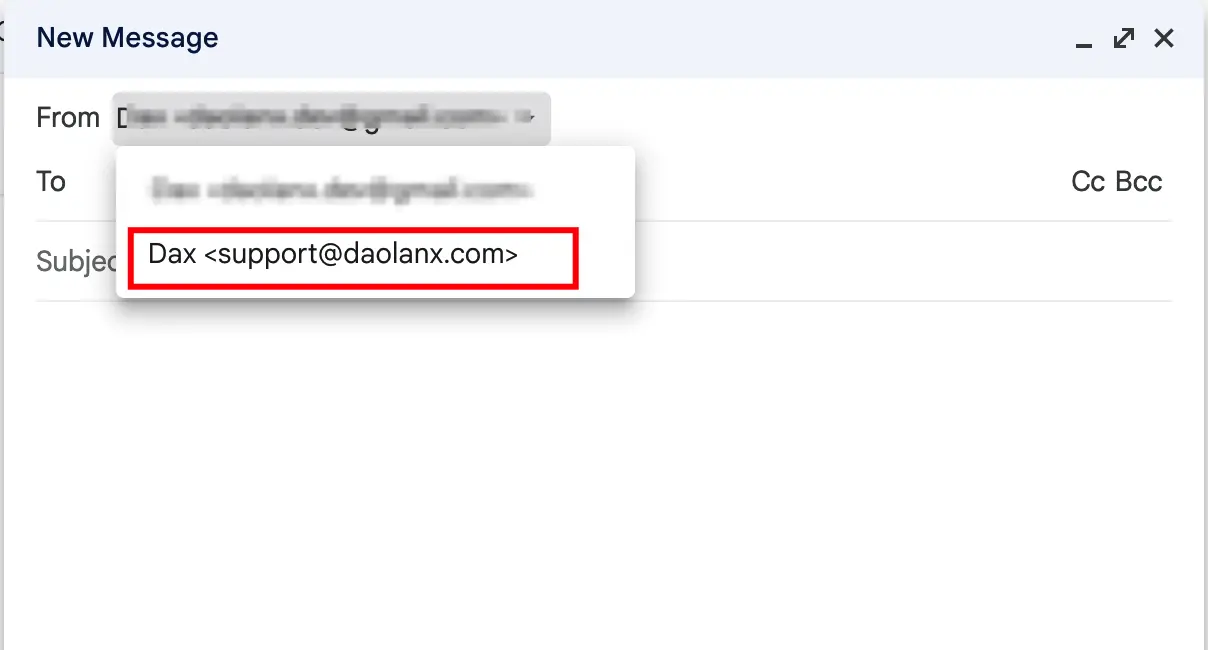
1.2 Sending Emails: Sending as the Custom Domain from Personal Gmail
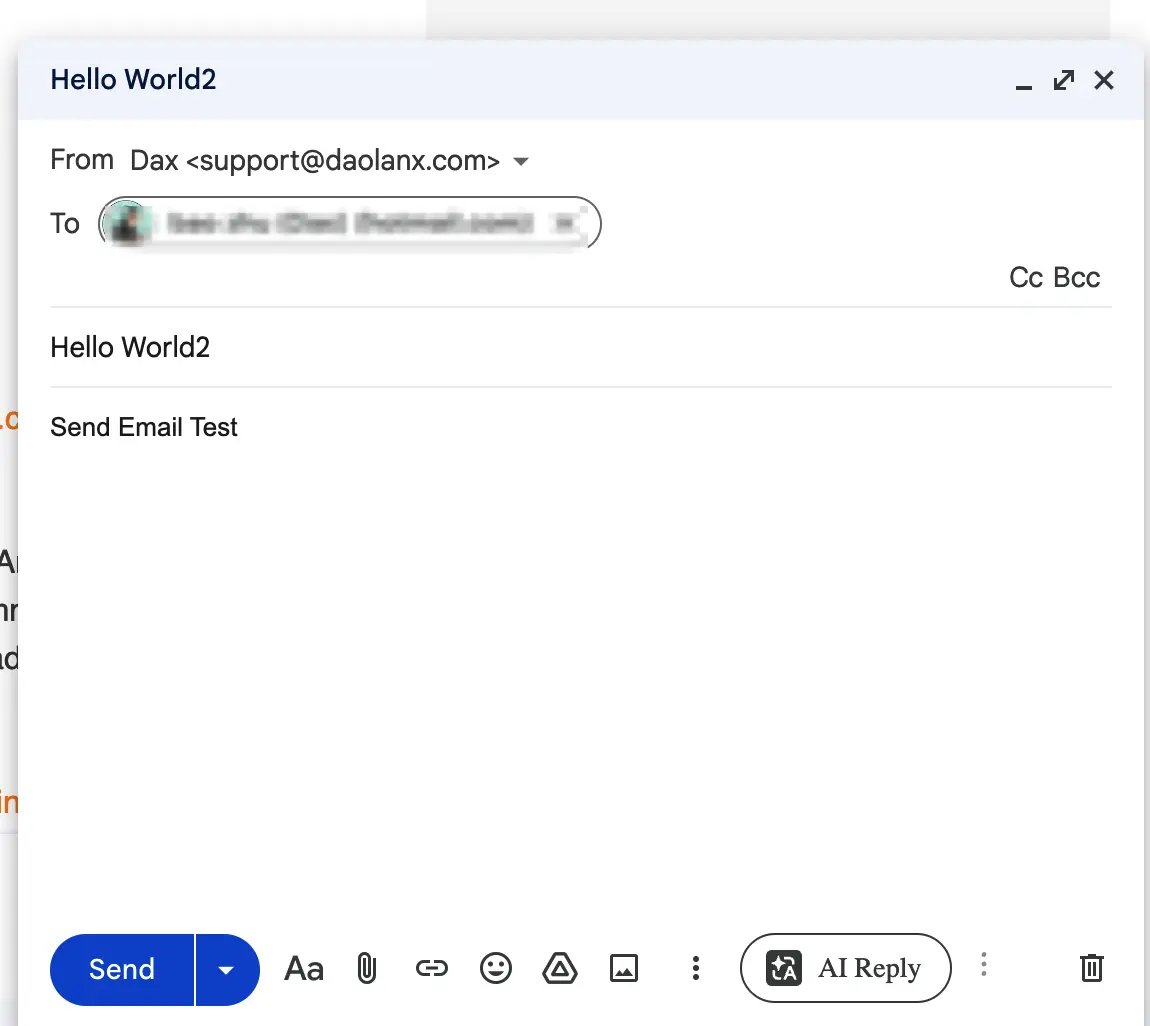
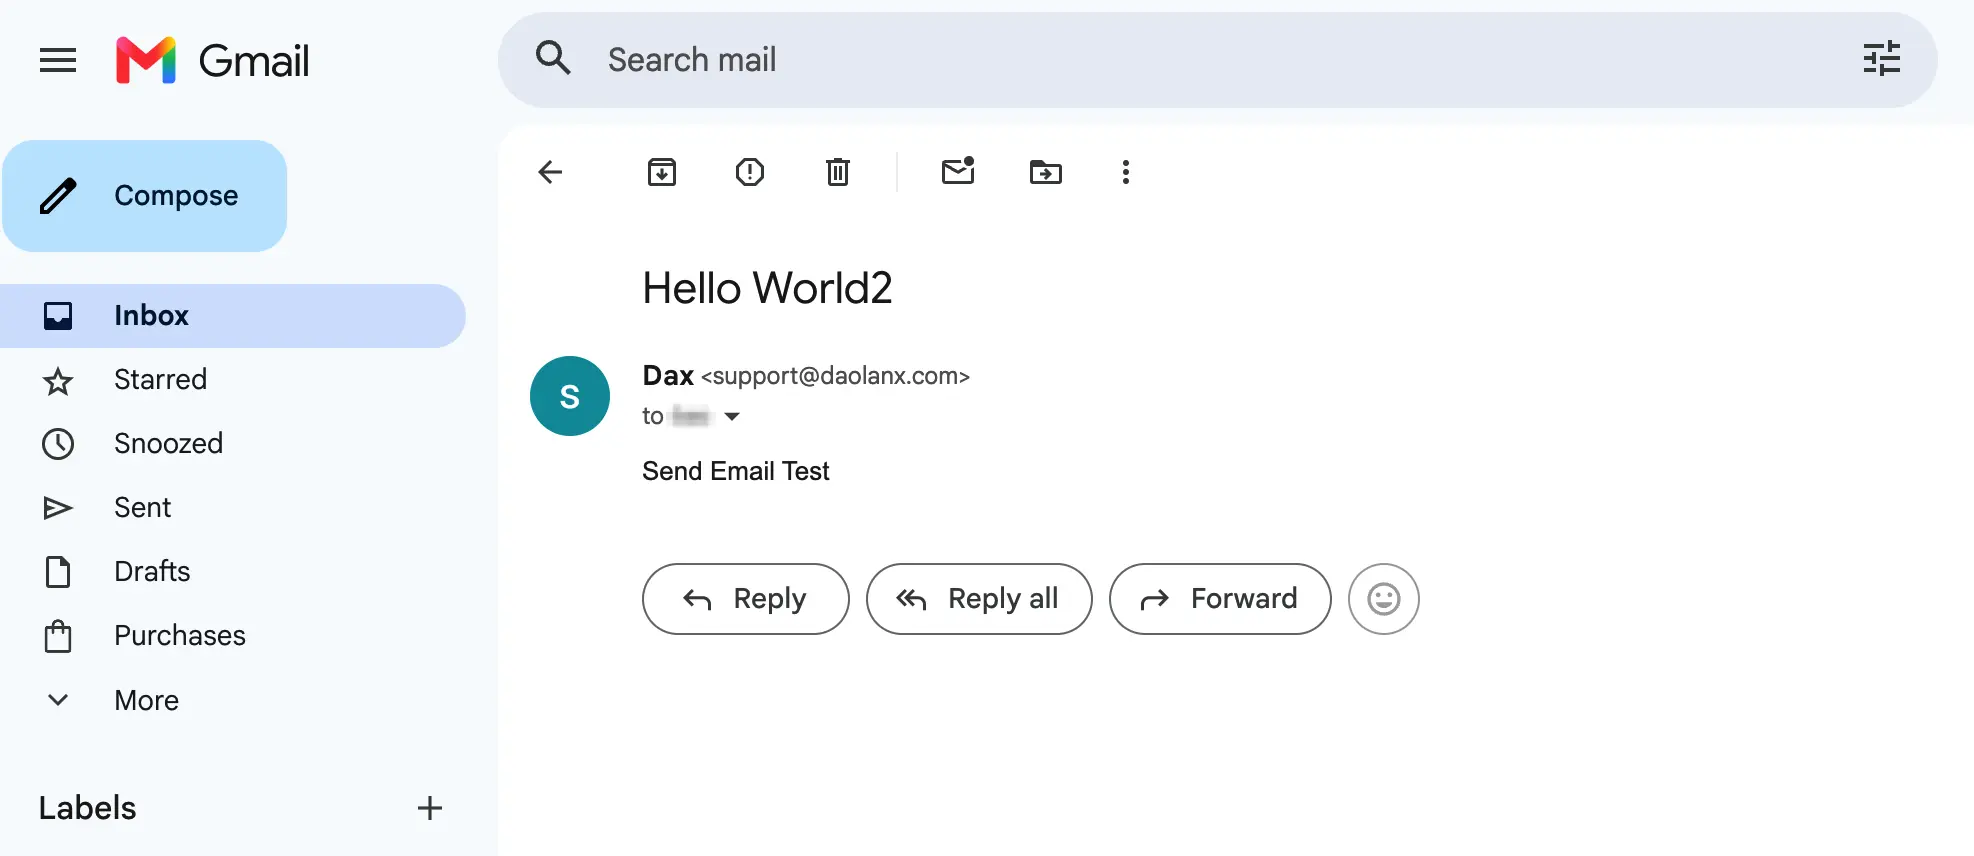
Switch the sender to support@daolanx.com within Gmail and send an email to a personal address. The recipient will receive it successfully.
This setup completely satisfies all functional requirements. As for quotas, the Resend Free Tier currently provides 3,000 emails per month, which is more than enough for early-stage projects.
2. Step-by-Step Guide to Sending Emails from Your Custom Domain
Core Idea: Leverage Resend’s SMTP capabilities alongside Gmail’s “Send mail as” feature to send emails under the identity of support@daolanx.com.
The configuration flow is Resend → Cloudflare → Gmail. Resend will generate a set of DNS records. We will first create the domain in Resend, add these records to Cloudflare to complete domain verification, and finally hook up the SMTP credentials in Gmail.
2.1 Resend Configuration
Resend provides the SMTP outbound capabilities for our domain email and generates a set of DNS records that need to be added to Cloudflare for domain verification.
Register and Create an API Key
- Sign up for a Resend account.
- Go to Dashboard → API Keys → Create API Key.
- Name it (e.g.,
gmail-smtp) and select Sending access for permissions. - Copy the generated API Key (formatted as
re_xxxx) and save it securely. You will need it later for the Gmail SMTP configuration.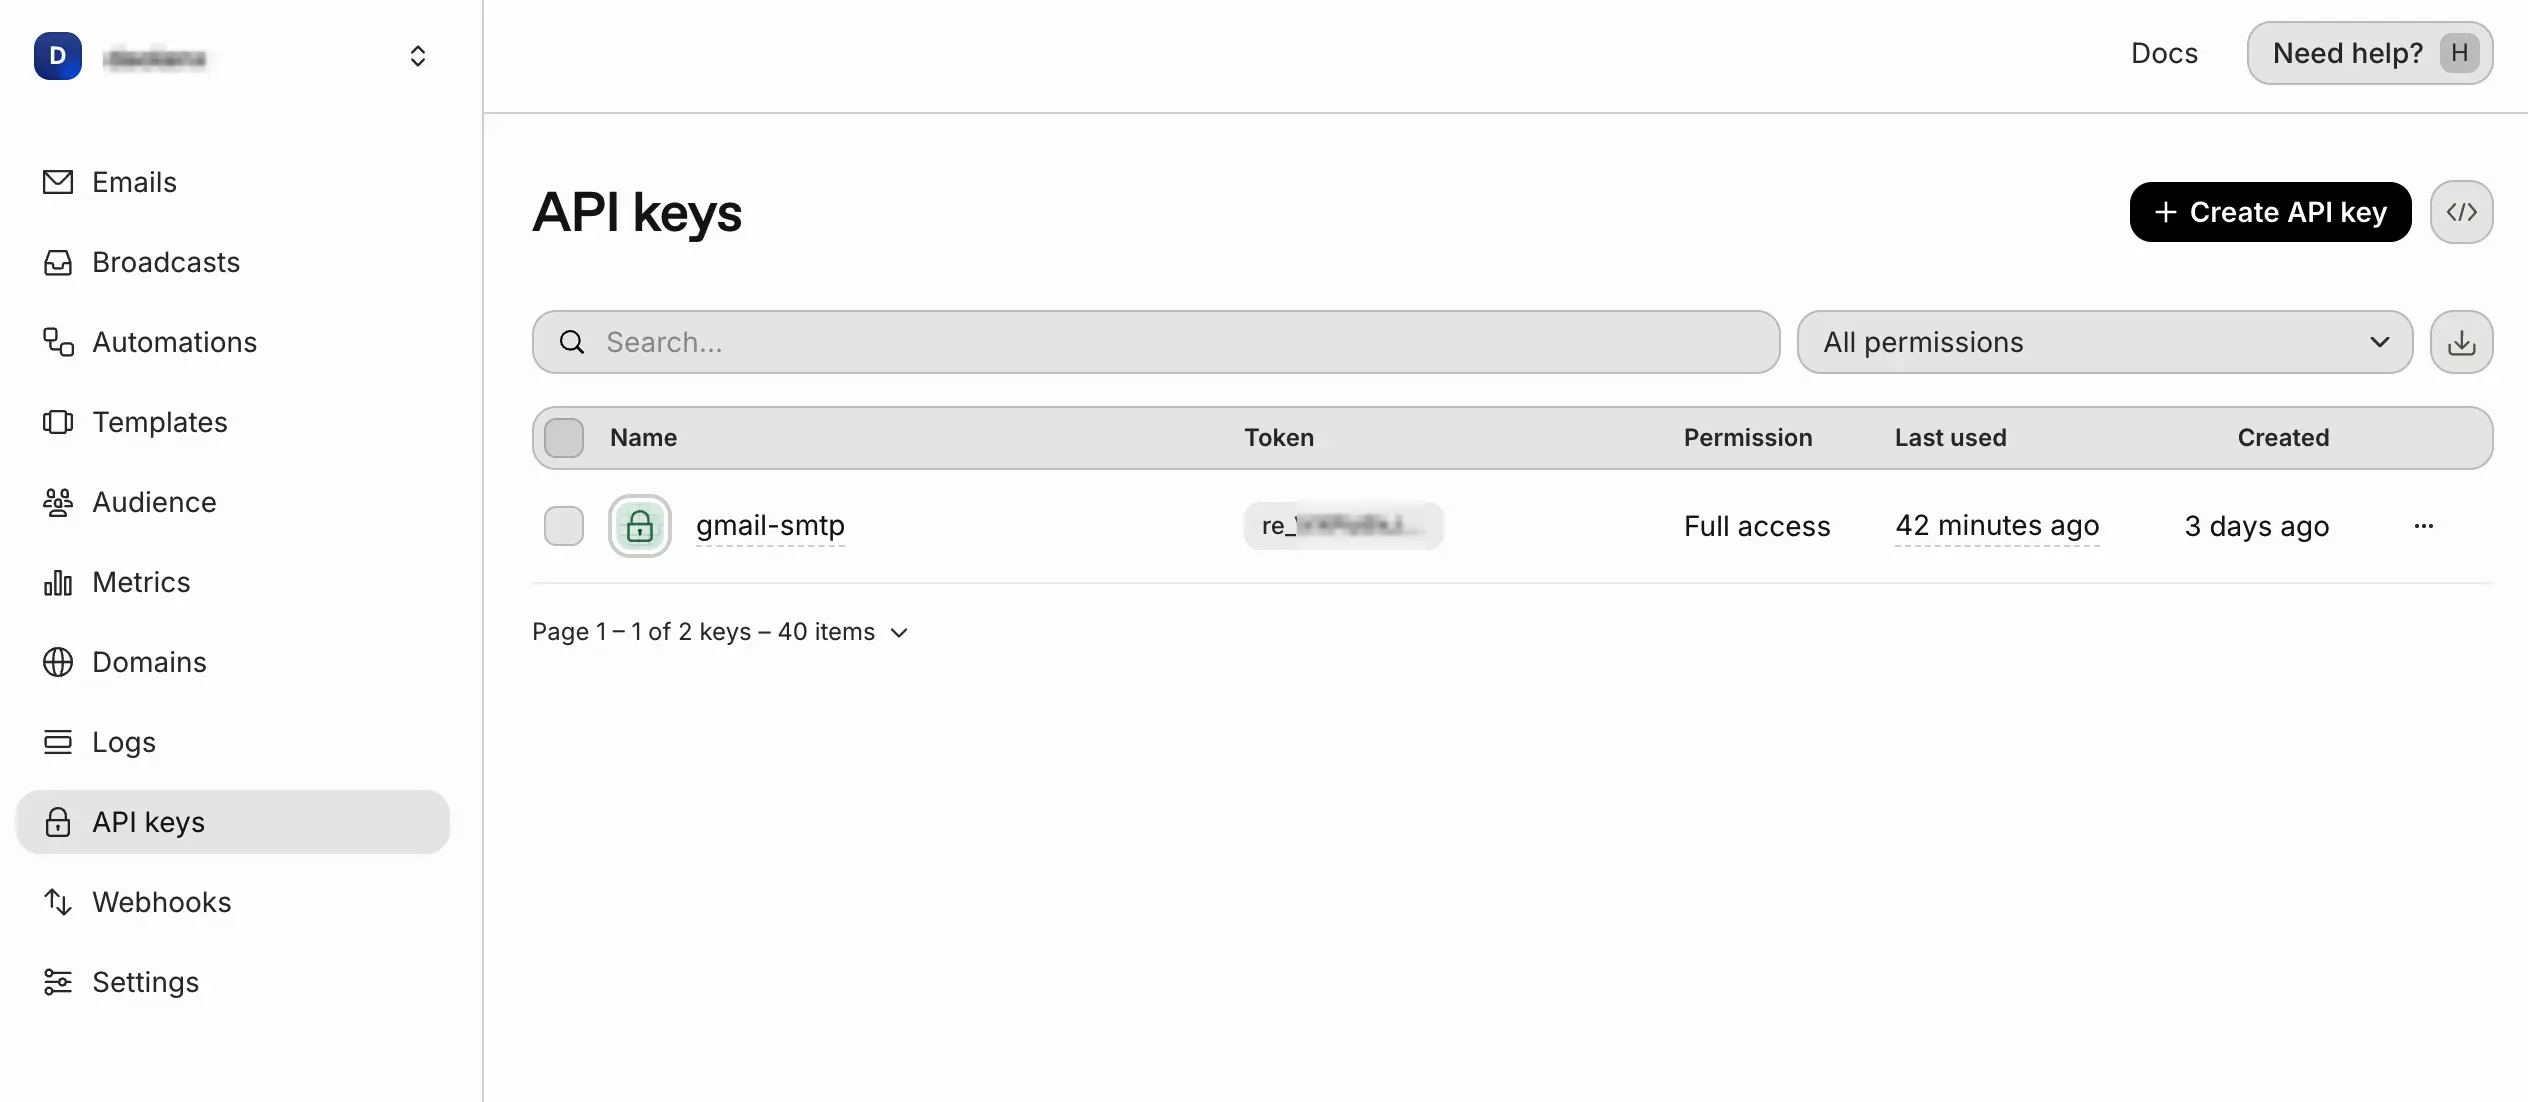
Add Domain and Get DNS Records
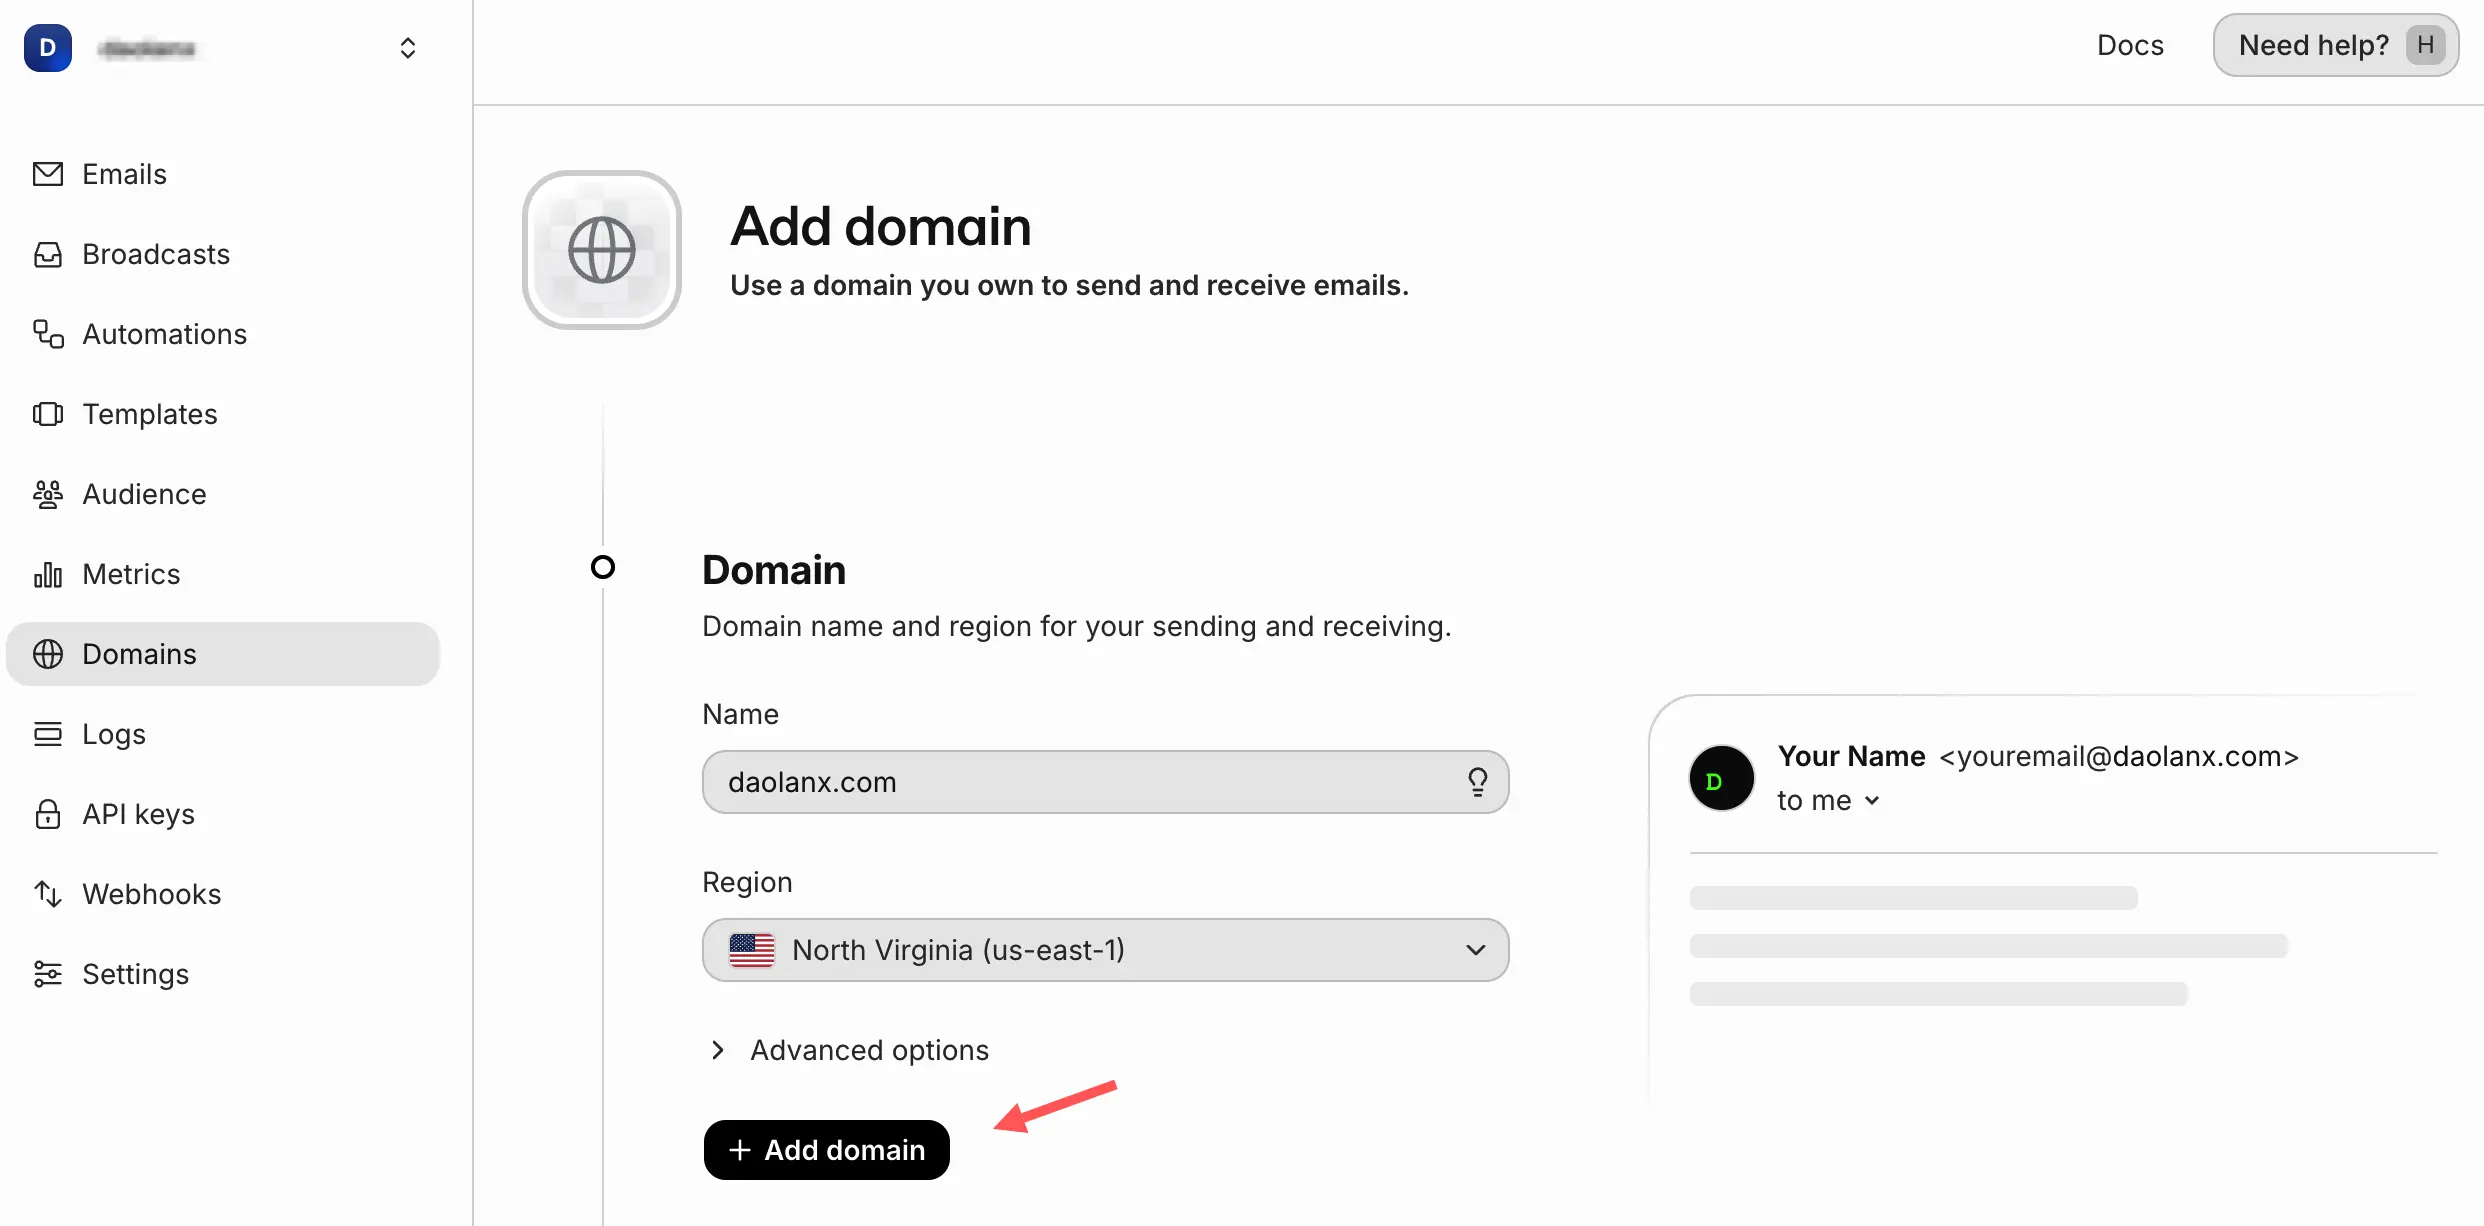
- Go to Dashboard → Domains → Add Domain.
- Enter your domain, such as
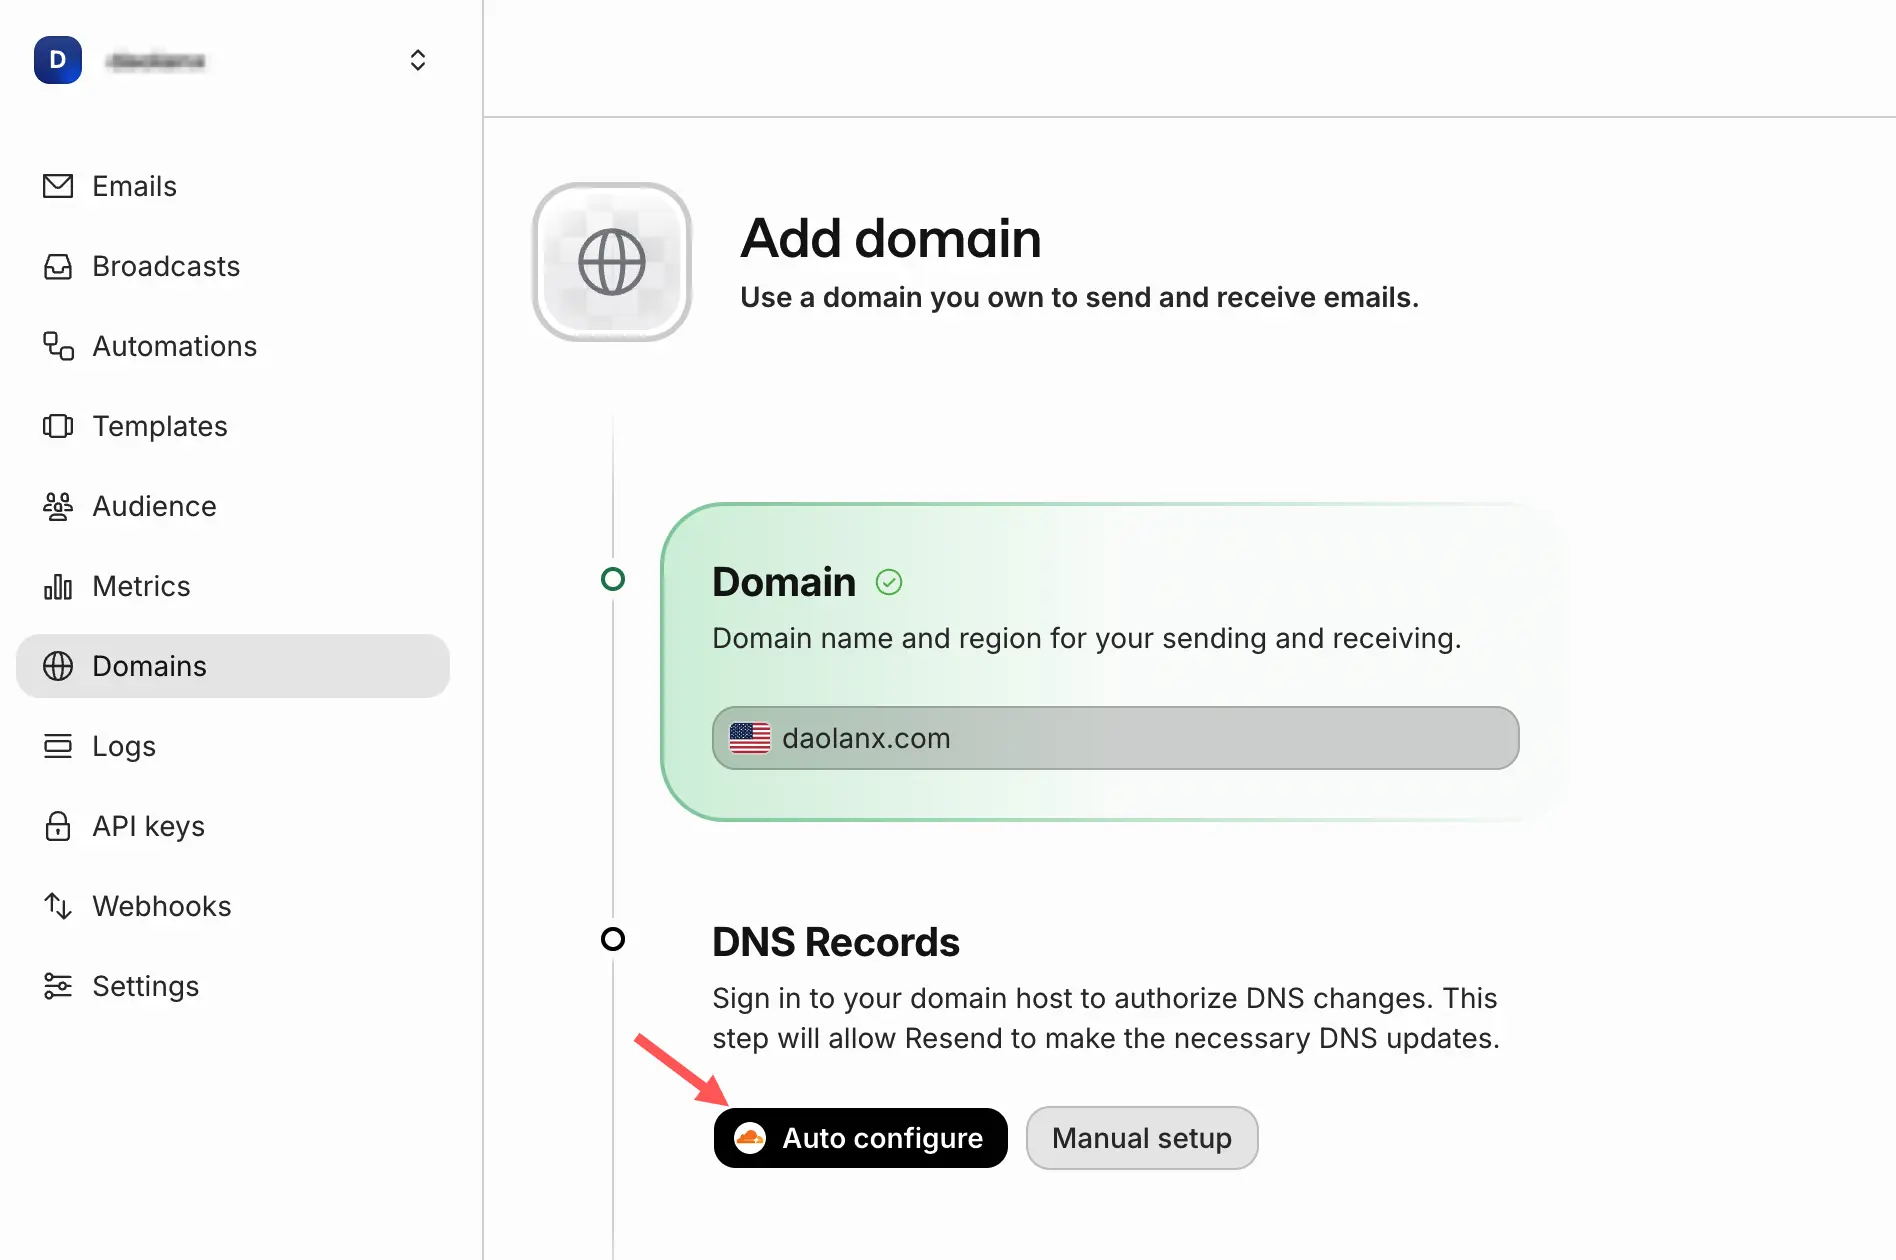
daolanx.com. - Resend will generate the required DNS records. Click Auto-configure to automatically update the corresponding DNS records in Cloudflare.
2.2 Cloudflare DNS Configuration
Although the previous step automatically imported the configurations, let’s review and break down what these records actually do in Cloudflare.
SPF (Sender Policy Framework) Record
daolanx.com  TXT  "v=spf1 include:_spf.mx.cloudflare.net include:_spf.resend.com ~all"
# - include:_spf.resend.com — Authorizes Resend's mail servers to send emails as daolanx.com
# - include:_spf.mx.cloudflare.net — Also authorizes Cloudflare
# ~all — Marks other sources as SoftFail (not rejected, but may be flagged as suspicious)
This record tells the receiving mail server who is authorized to send emails on behalf of daolanx.com. When the recipient’s server receives an email, it checks this record. Since the sending server belongs to Resend (which is on the authorized list), the email is deemed legitimate.
DKIM (DomainKeys Identified Mail) 记录
resend._domainkey.daolanx.com TXT "p=MIGfMA0GCSqGSIb3DQEBA..."Provides a public key for the recipient to verify the email signature. Every email sent by Resend is digitally signed with a private key. The receiving server uses the public key from this DNS record to verify if the signature matches, confirming that the email content hasn’t been tampered with and truly originated from an authorized sender of daolanx.com.
Reend 的 Amazon SES 配置
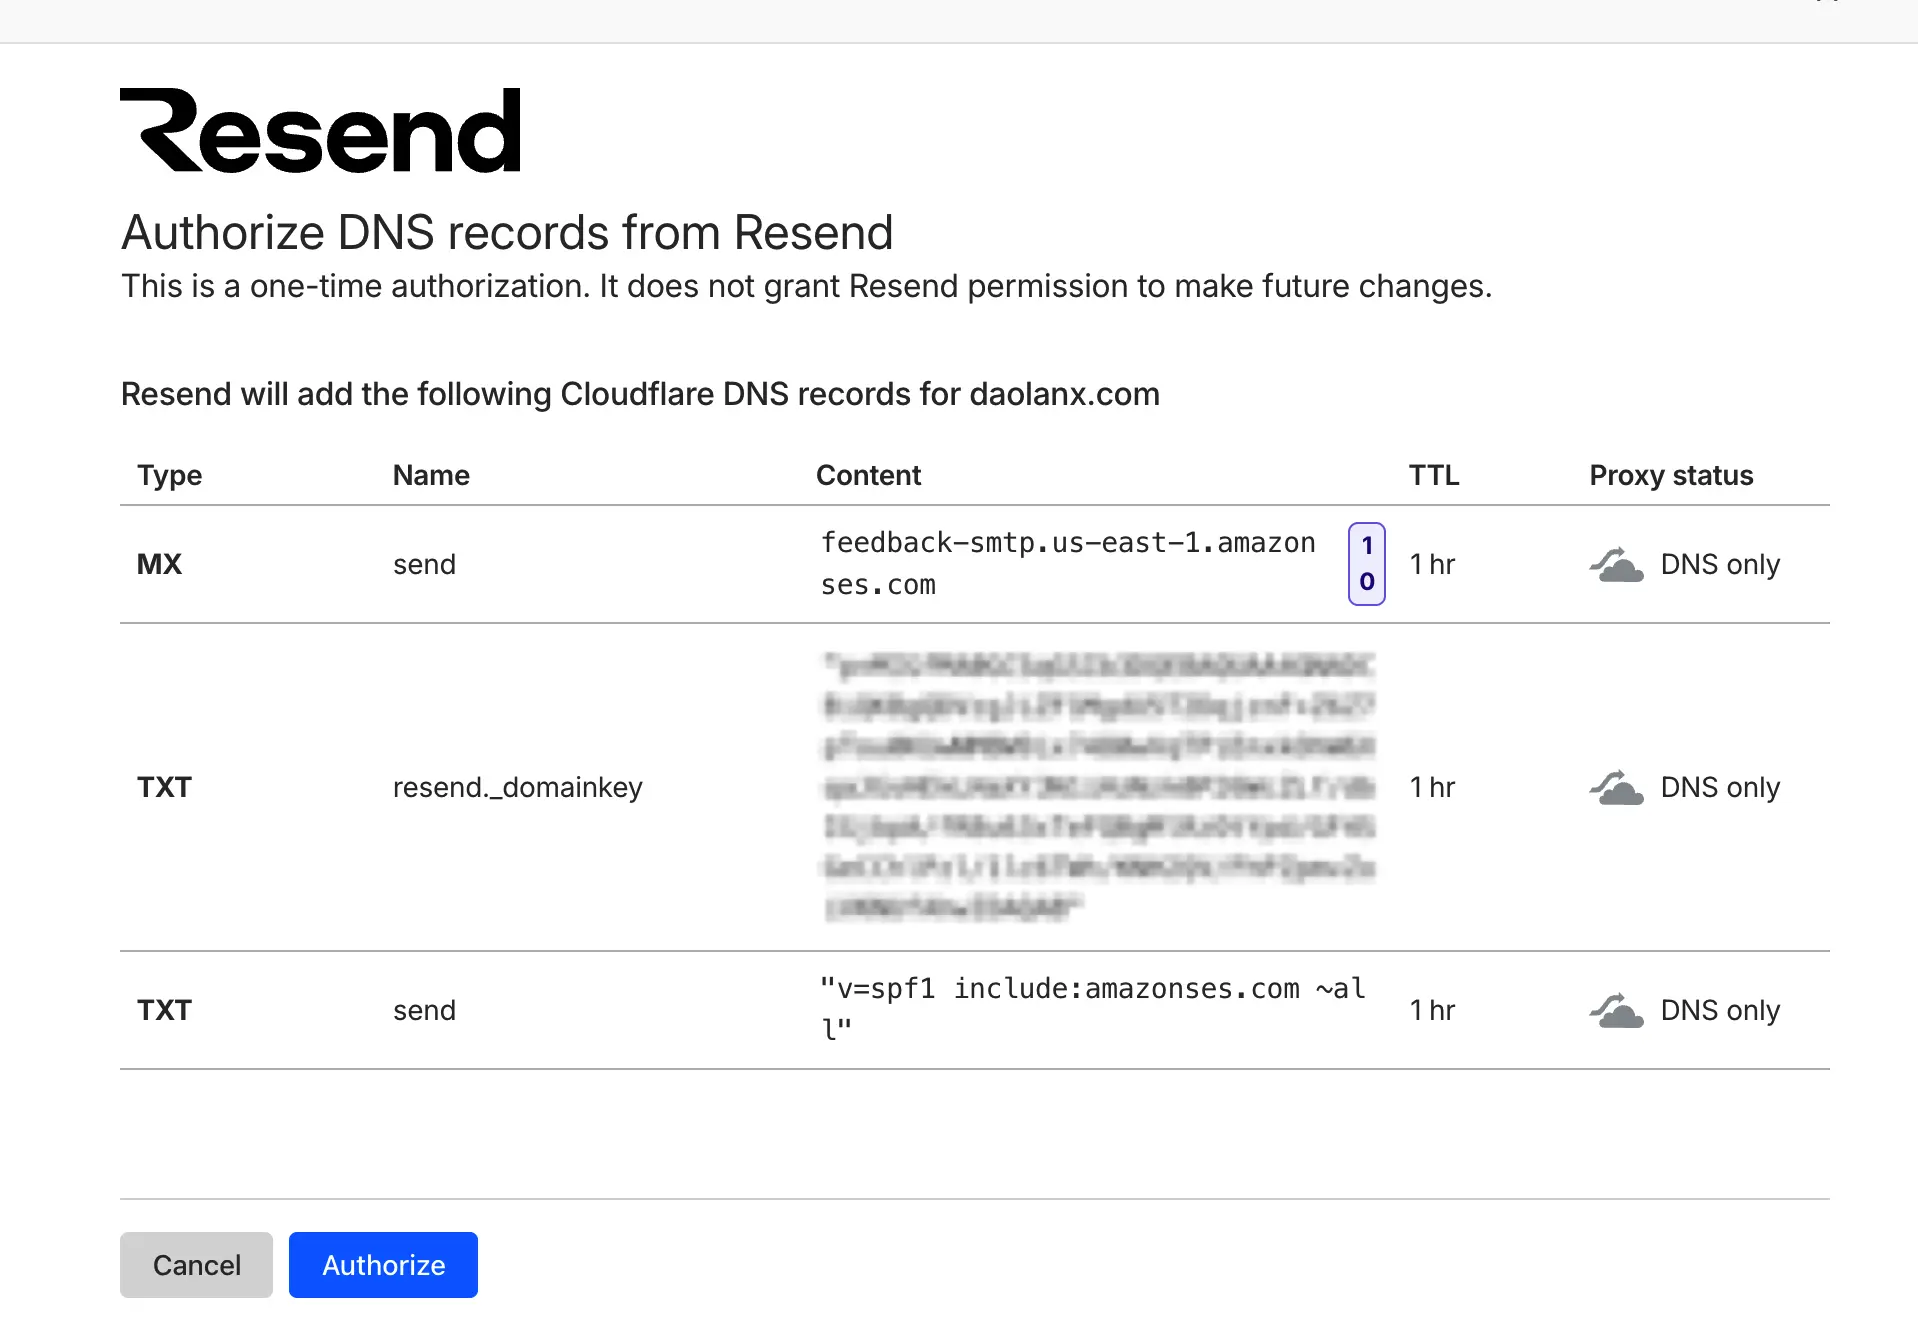
send.daolanx.com MX feedback-smtp.us-east-1.amazonses.com # Bounces for send.daolanx.com are received and handled by Amazon SES
send.daolanx.com TXT "v=spf1 include:amazonses.com ~all" # Authorizes Amazon SES to send bounce-related feedback emails as send.daolanx.com
Resend relies on Amazon SES under the hood; these two records are primarily used for Resend’s bounce handling configuration.
DMARC (Domain-based Message Authentication, Reporting, and Conformance)
_dmarc.daolanx.com 1 IN TXT "v=DMARC1; p=none;"Adds an alignment check on top of SPF and DKIM to further improve security. The current configuration is p=none, meaning that if the alignment check fails, no block is enforced, and the email is delivered normally. Some email providers (including Gmail) look for a DMARC record as a trust signal for the domain, so configuring it is highly recommended.
2.3 Gmail 配置「Send mail as」
Connect Resend SMTP via Gmail’s “Send mail as” feature to send emails as support@daolanx.com.
添加 support@daolanx.com 为发件人地址
-
- Open Gmail → Click the gear icon in the top right → See all settings → Accounts and Import.
-
- Locate
Send mail asand clickAdd another email address.
- Locate
-
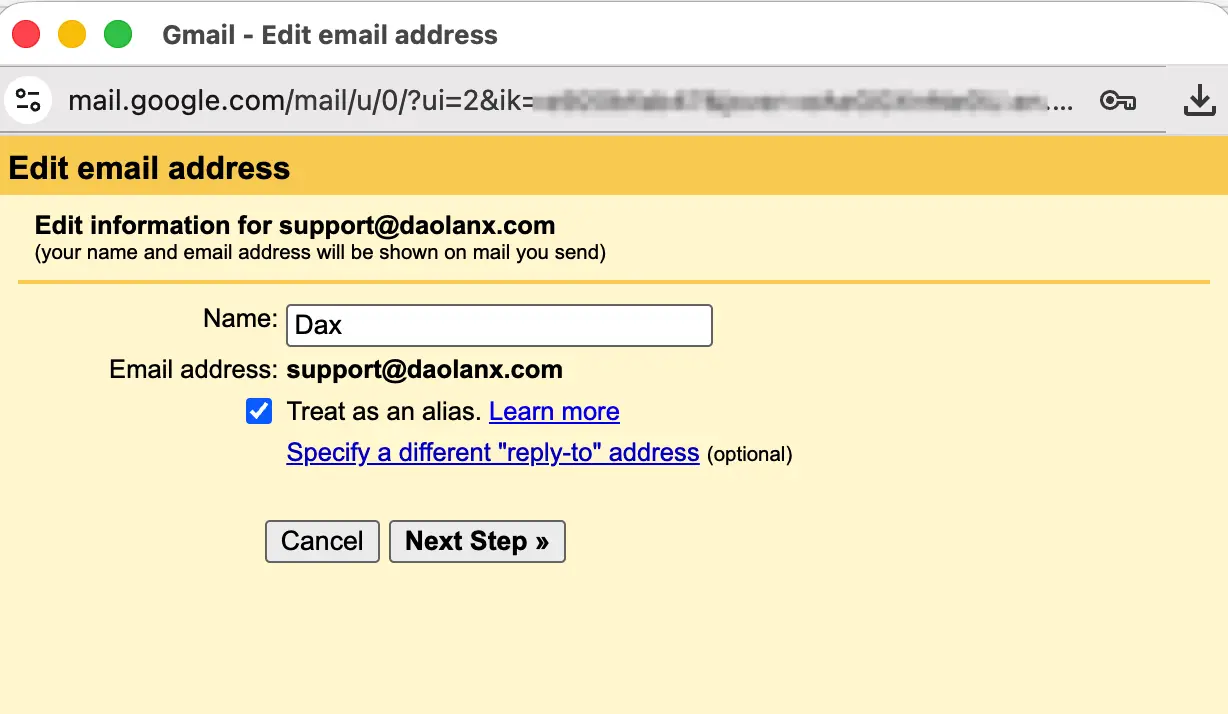
- In the pop-up window, fill out:
- Name: The display name for the sender, e.g.,
Support. - Email address:
support@daolanx.com - Check
Treat asan alias (leave as default, so when replying to or forwarding emails, the system will automatically usesupport@daolanx.comto reply).
-
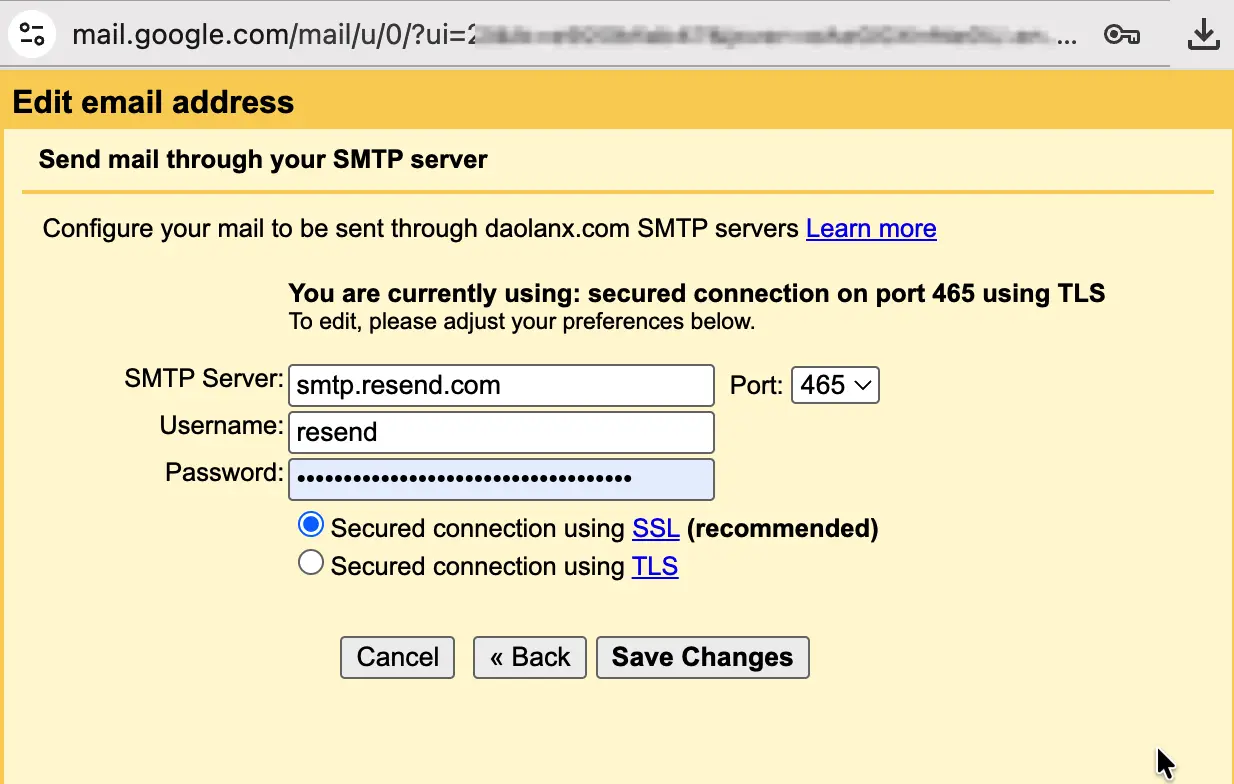
- Click Next Step and fill in the SMTP information:
- Server: smtp.resend.com
- Port: 465
- Username: resend
- Password: Paste the Resend API Key saved earlier (re_xxxx).
- Select
Secured connection using SSL.
Once configured, you can send emails from Gmail using your custom domain identity.
3. Step-by-Step Guide to Receiving Emails on Your Custom Domain
Core Idea: Use Cloudflare’s Email Routing to automatically route and forward emails sent to support@daolanx.com to your personal Gmail.
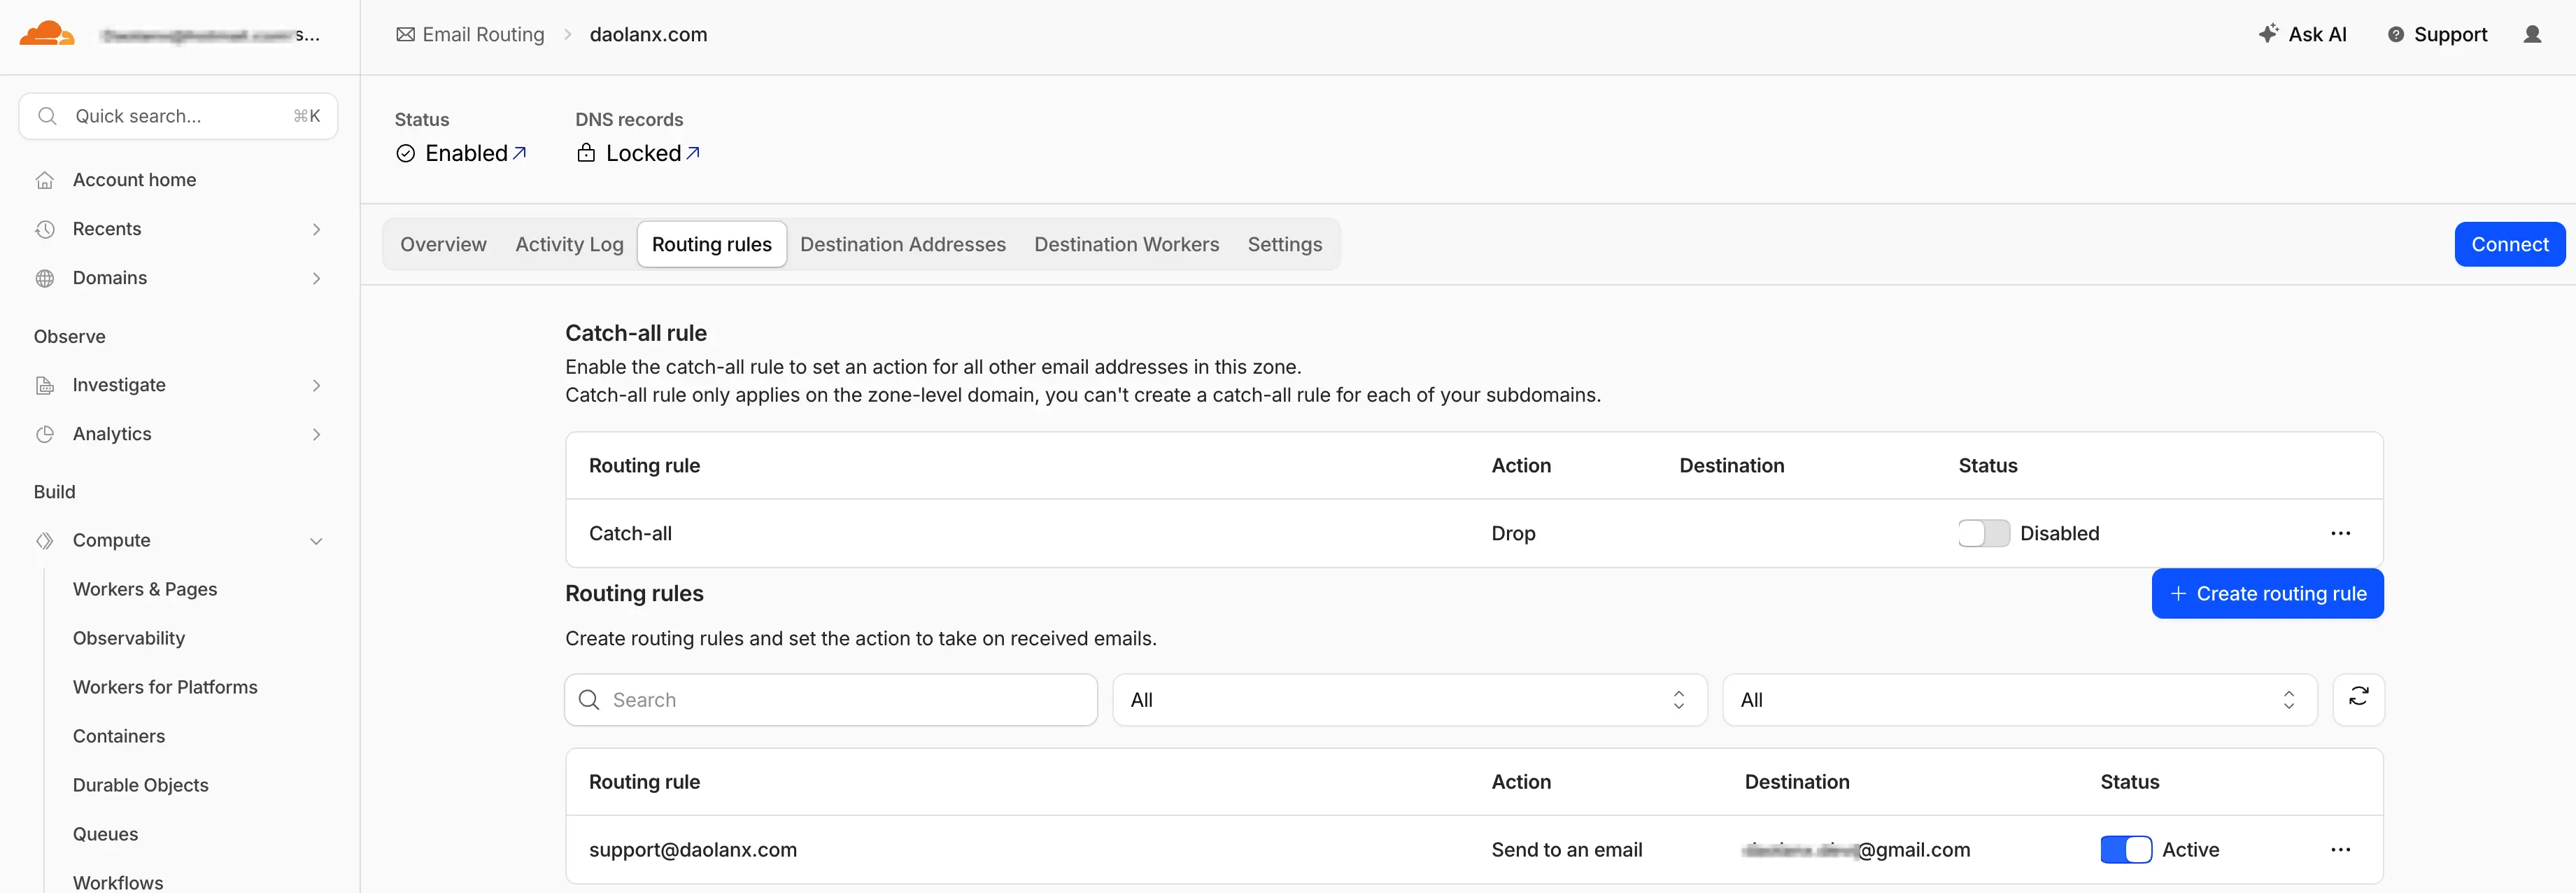
-
- In the Cloudflare Dashboard, navigate to Email → Email Routing.
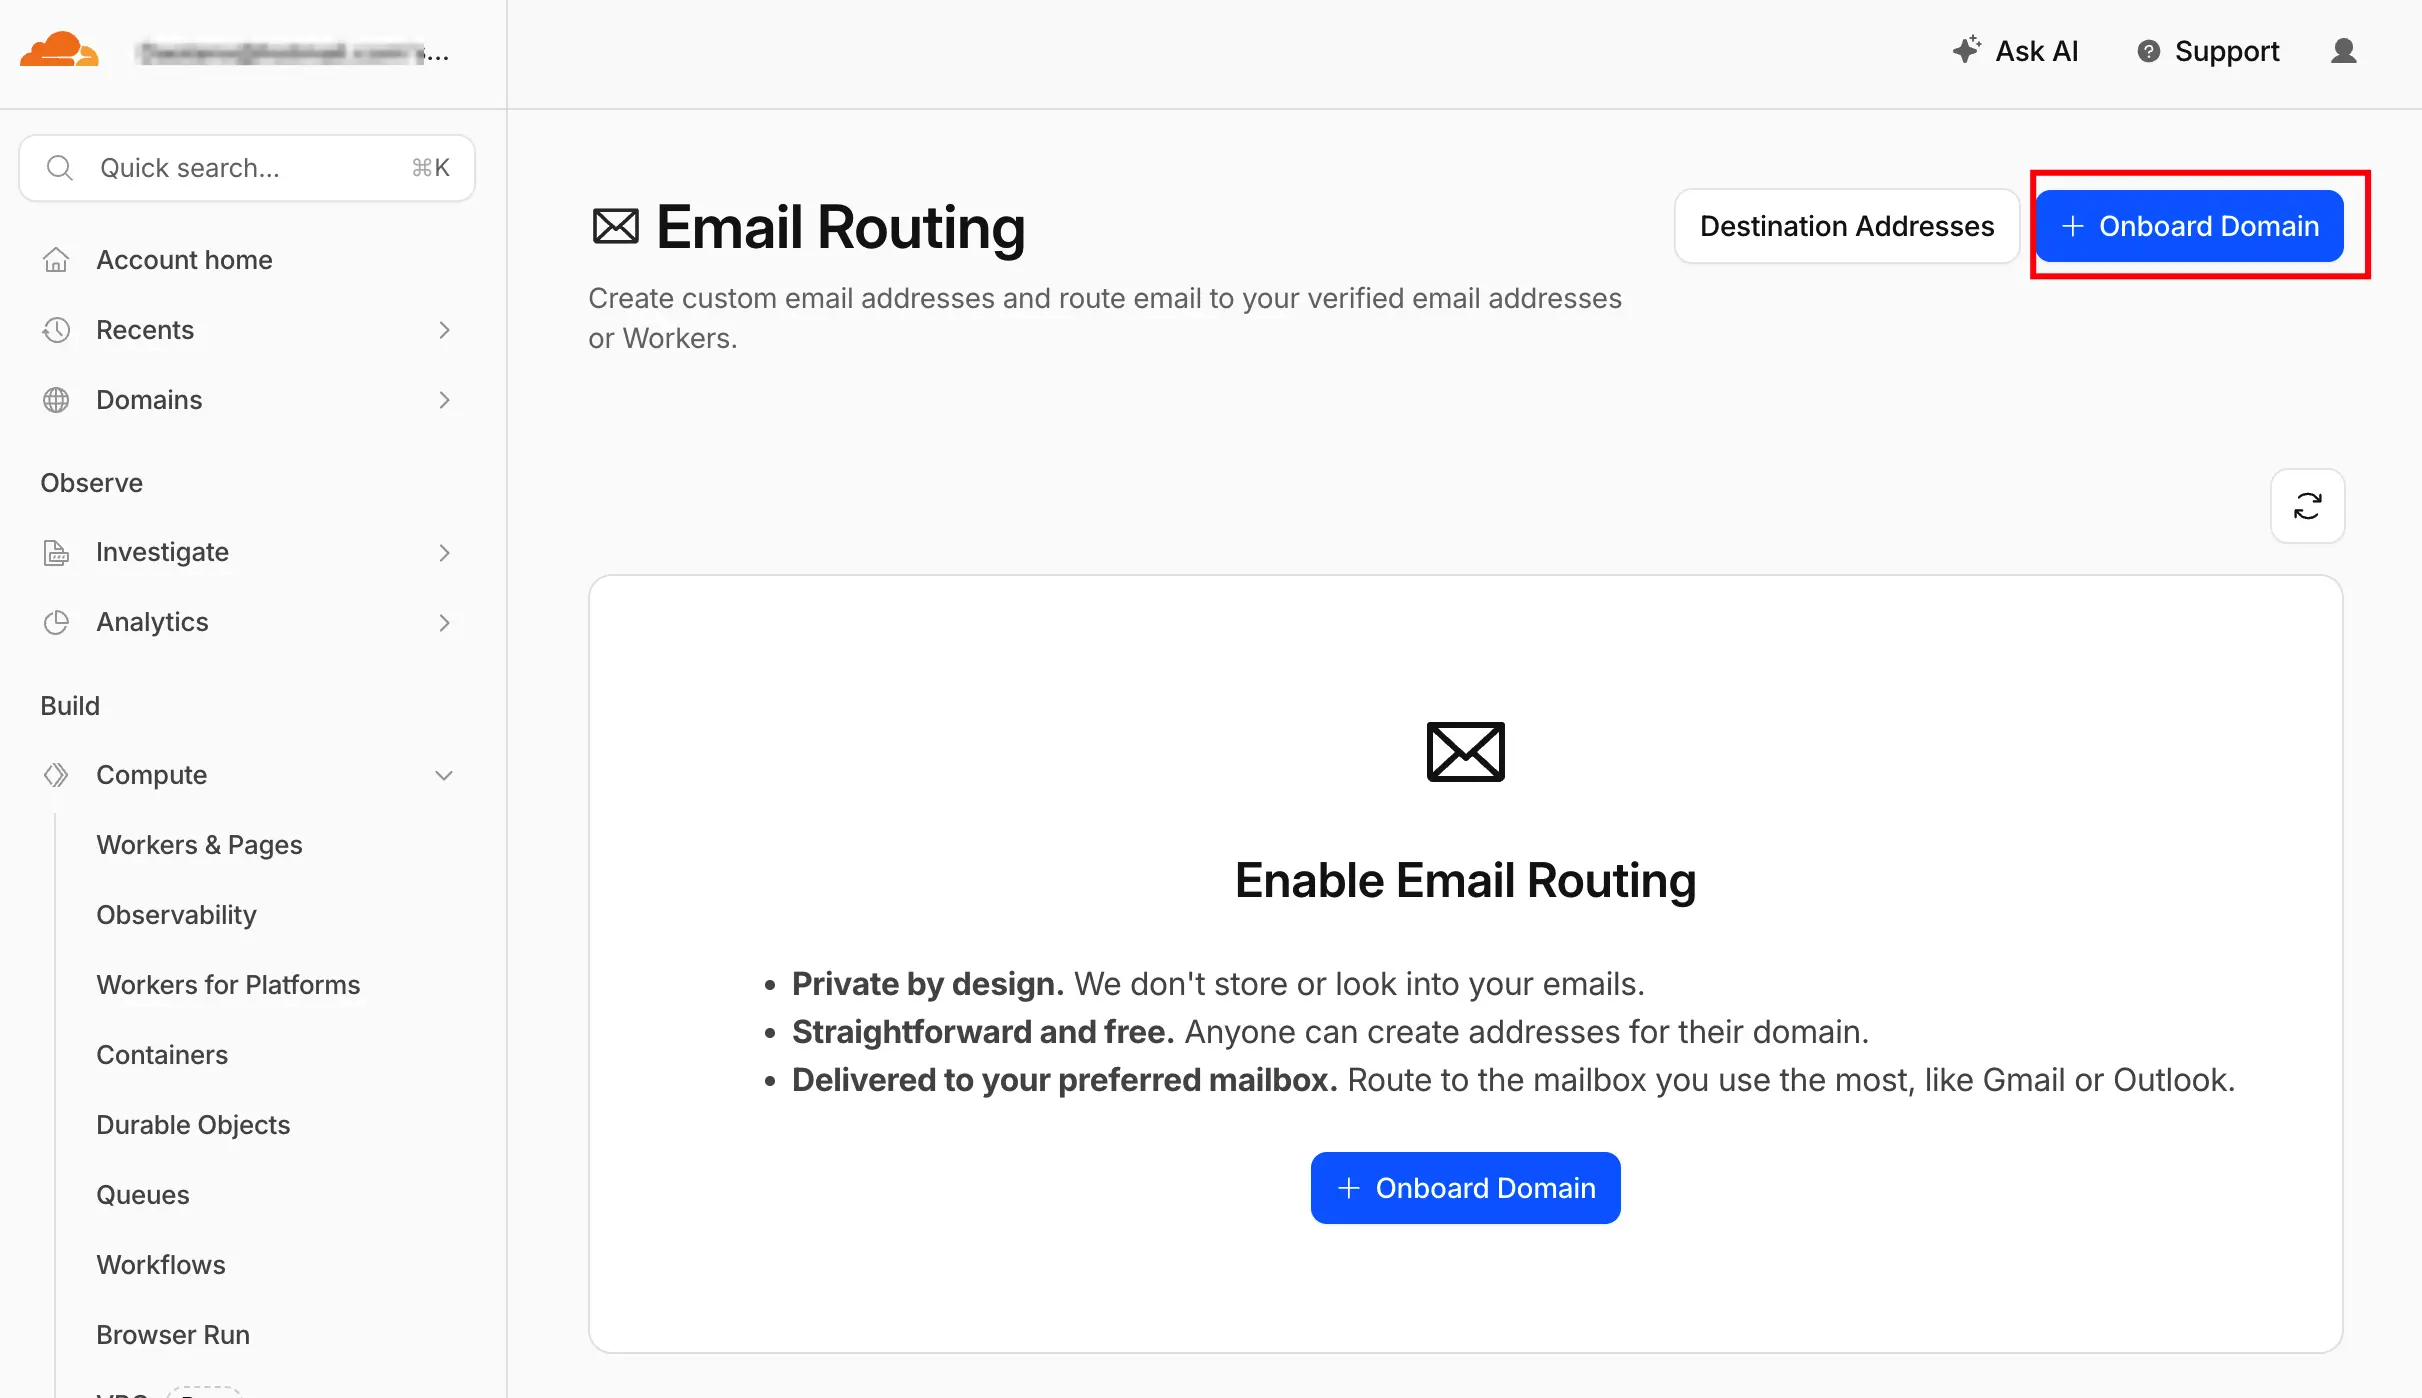
-
- For first-time setups, click Get Started. Cloudflare will automatically add the required MX records (pointing to
route.mx.cloudflare.net).
- For first-time setups, click Get Started. Cloudflare will automatically add the required MX records (pointing to
-
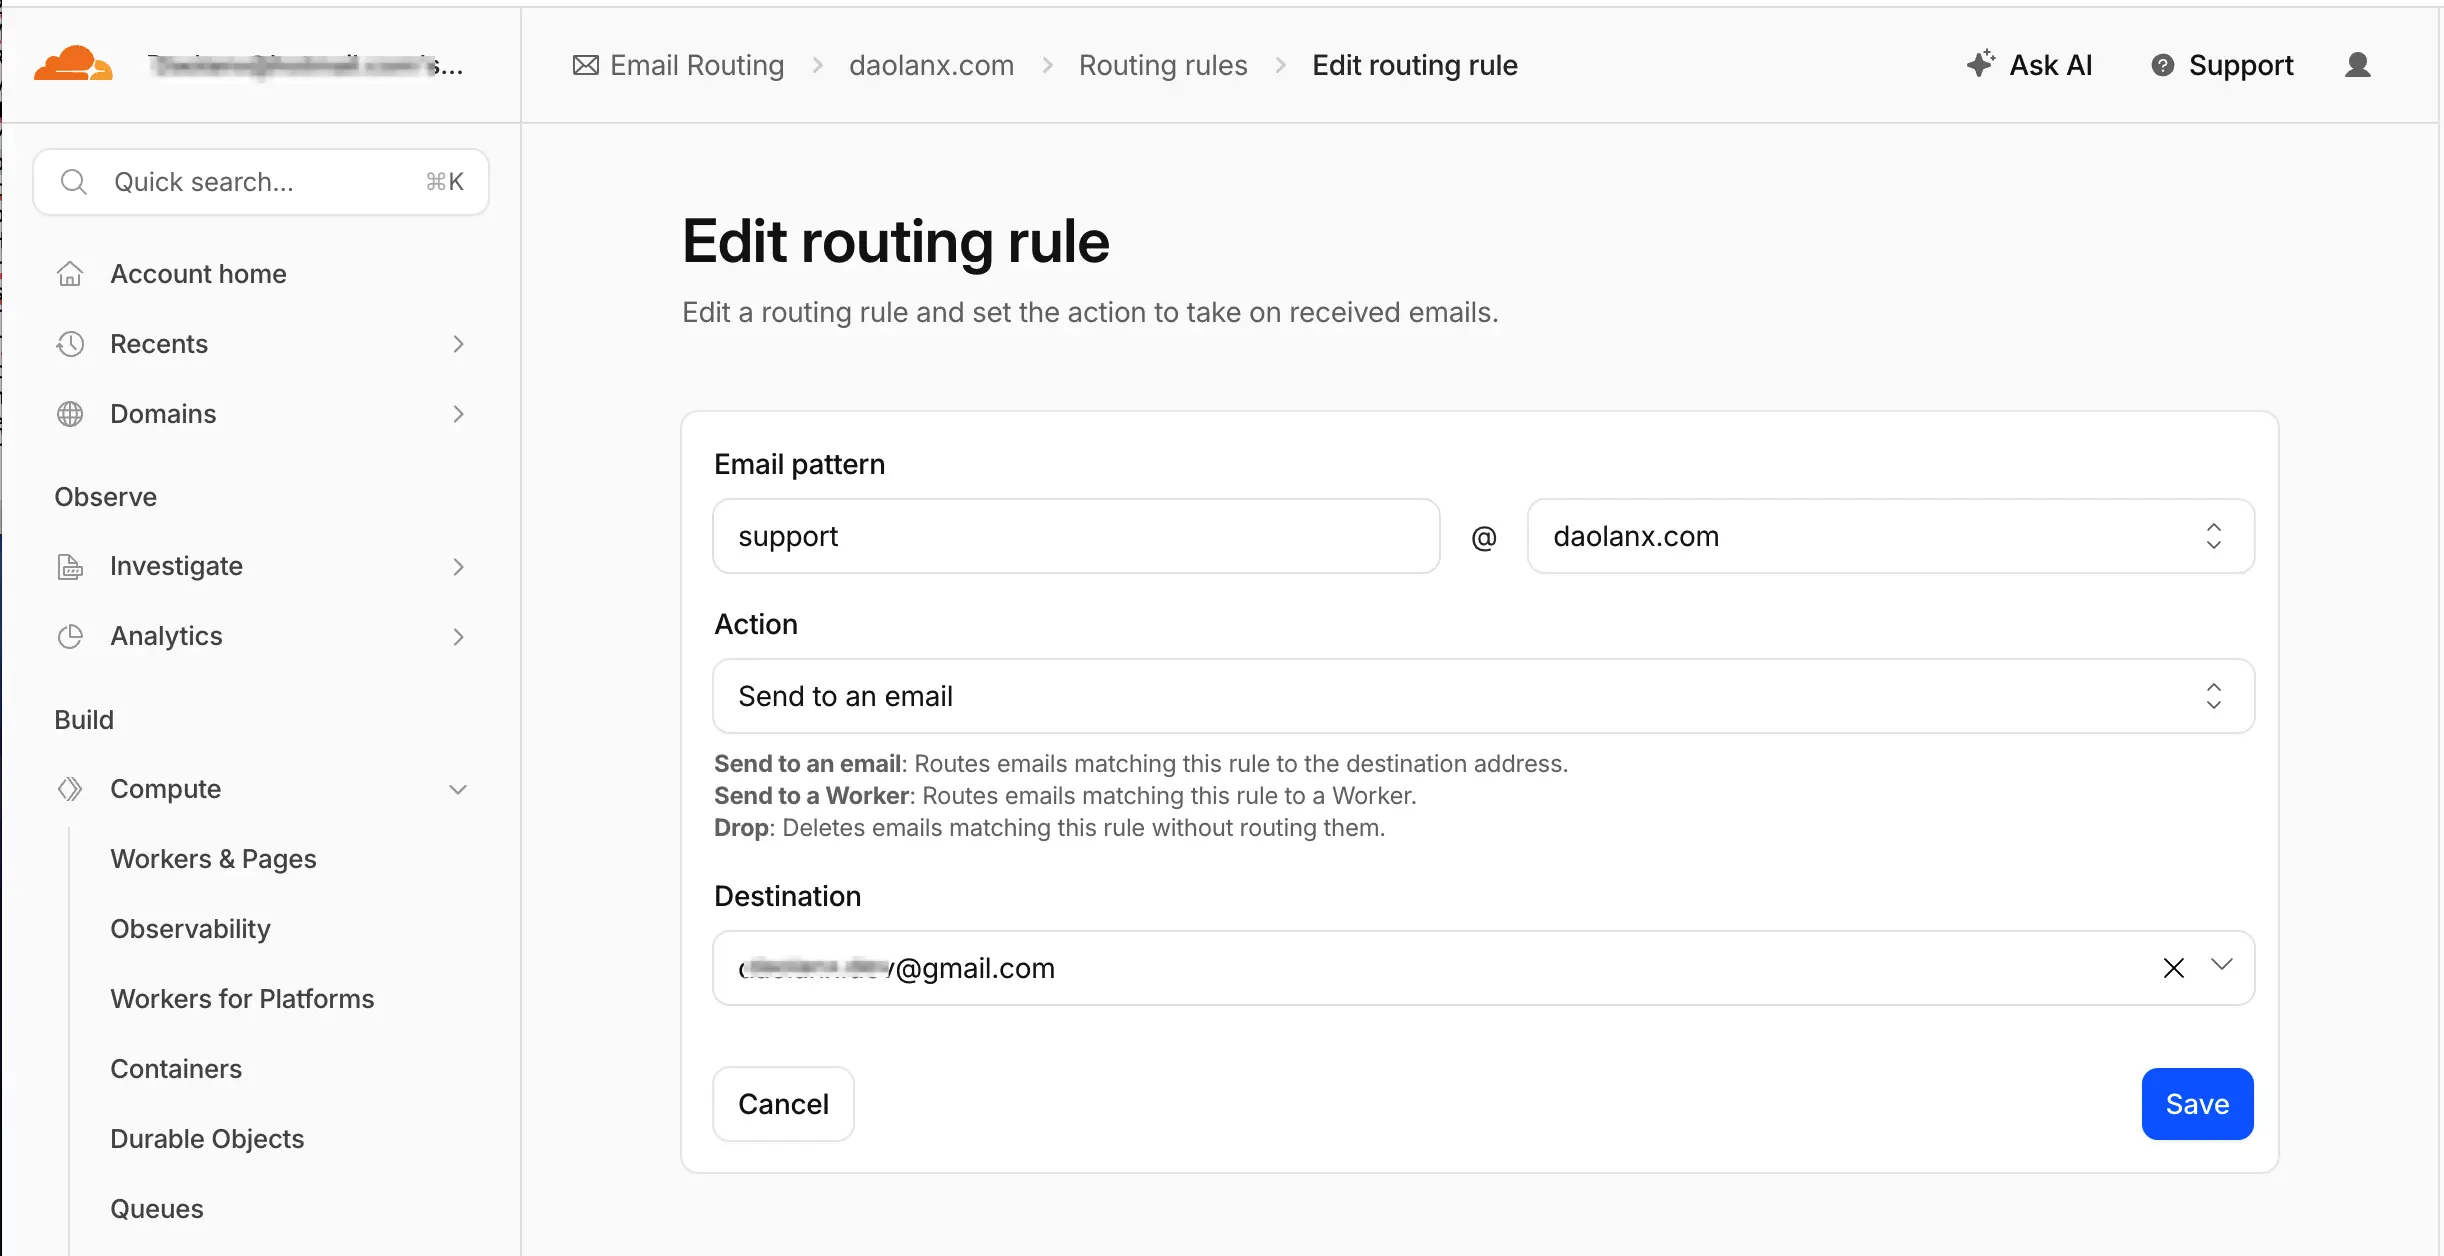
- Switch to the
Routing Rulestab and add a new routing rule:
- Custom address: support
- Action: Forward to
- Destination: Your personal Gmail address (e.g., you@gmail.com).
- Switch to the
4. Conclusion
By combining these three services—Resend, Cloudflare, and Gmail—we can spin up a highly available custom domain email solution at zero cost. Resend handles outbound delivery via SMTP, Cloudflare manages DNS and email routing/forwarding, and Gmail serves as your daily interface for reading and writing emails. Each service does what it does best, saving you from paying for expensive enterprise email hosting.
The biggest advantage of this stack is its zero upfront cost and clean configuration pipeline. It is perfect for indie developers looking to quickly establish a professional-facing email for early-stage products. Resend’s free tier offers 3,000 emails per month, which easily covers initial needs. As your business grows and you require more aliases or hit quota limits, you can seamlessly migrate to Zoho Mail’s $1 plan or other professional email setups.